
How to Use SyncBackPro with Cloudflare R2: A Step-by-Step Guide
Author: Michael J. Leaver, 2BrightSparks Pte. Ltd.
SyncBackPro supports Cloudflare R2, an S3-compatible and affordable cloud object storage. This tutorial takes you through the steps on how to set up SyncBackPro to directly backup your files to Cloudflare R2. Whether you're looking for a secure cloud storage solution or want to automate backups with S3-compatible backup software, this step-by-step tutorial will assist you in setting up Cloudflare R2 with SyncBackPro in an efficient and cost-effective manner.
Cloudflare R2 Setup
First, you need an account with Cloudflare, which is free and simple to do. When you first sign-in, Cloudflare may ask you for a domain name. If you don't have one, instead click Start building in the Build apps on our developer platform box (in the Looking for something else? section at the bottom of the page):

After you've confirmed your email address with Cloudflare, go to the R2 Object Storage settings:
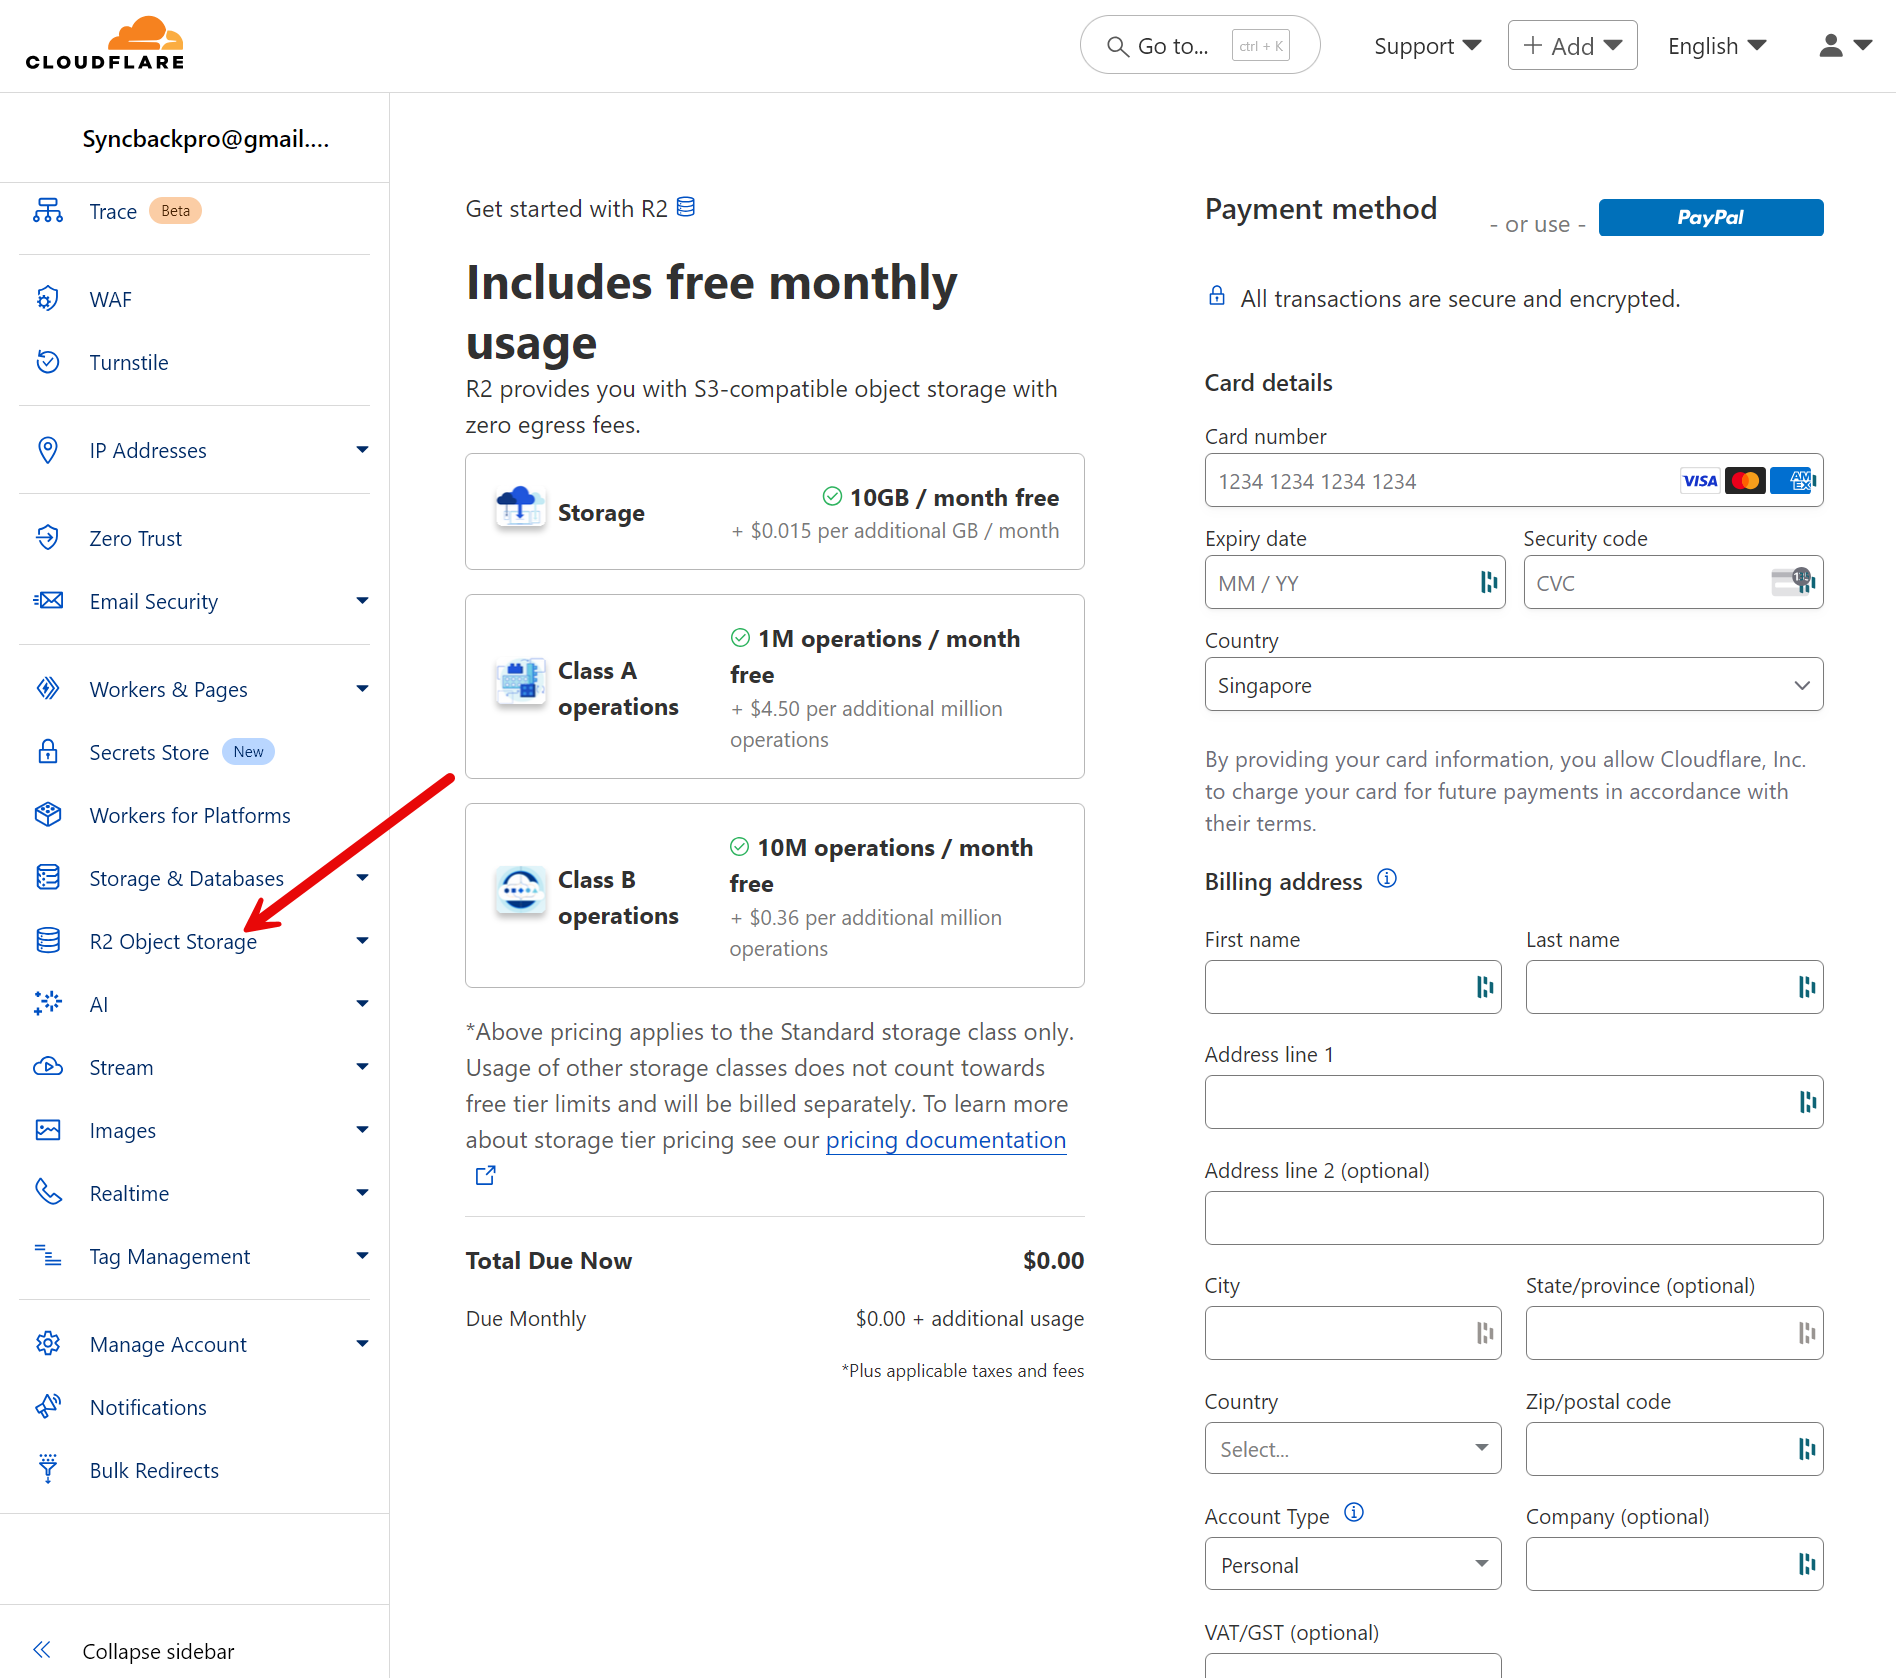
Even though you can store up to 10GB of data for free in R2 cloud storage, you must enter your billing details. After you've entered your billing details, you must create a bucket. Think of a bucket like a storage device, e.g. an SSD. All files in Cloudflare R2 must go into a bucket.

You can specify the physical location of the bucket, but in most cases it's best to use Automatic. For the storage class, it may be tempting to choose Infrequent Access but you need to be aware of the limitations, e.g. a file (object) must be stored for at least 30 days in R2. There are also data retrieval fees when using Infrequent Access, so if you need to restore your files then it will not be free (unlike Standard, which is free). Refer to the R2 documentation for pricing information.
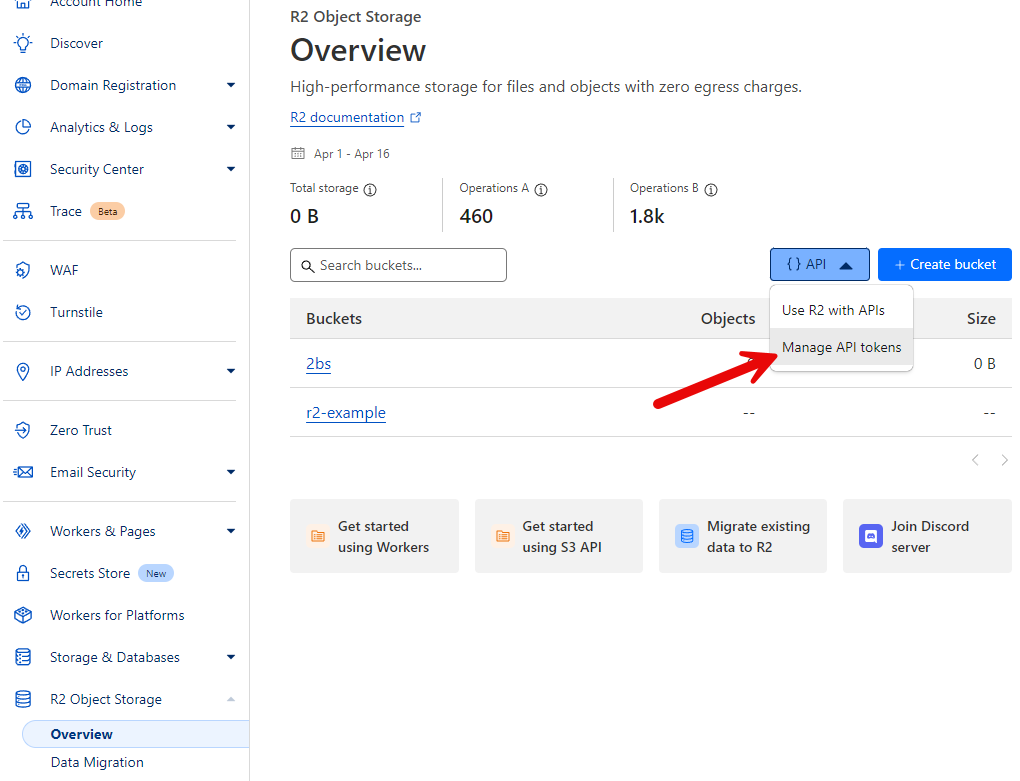
Once you've created your bucket, we need to get the tokens that SyncBackPro needs to access the bucket. To do that, go to the R2 Object Storage settings on the Cloudflare website, and select Manage API tokens from the { } API dropdown menu.
Next, click Create Account API Token or Create User API Token. SyncBackPro is compatible with either option. The choice depends on how you use your Cloudflare account. After you've clicked one of them, you are presented with a number of options:
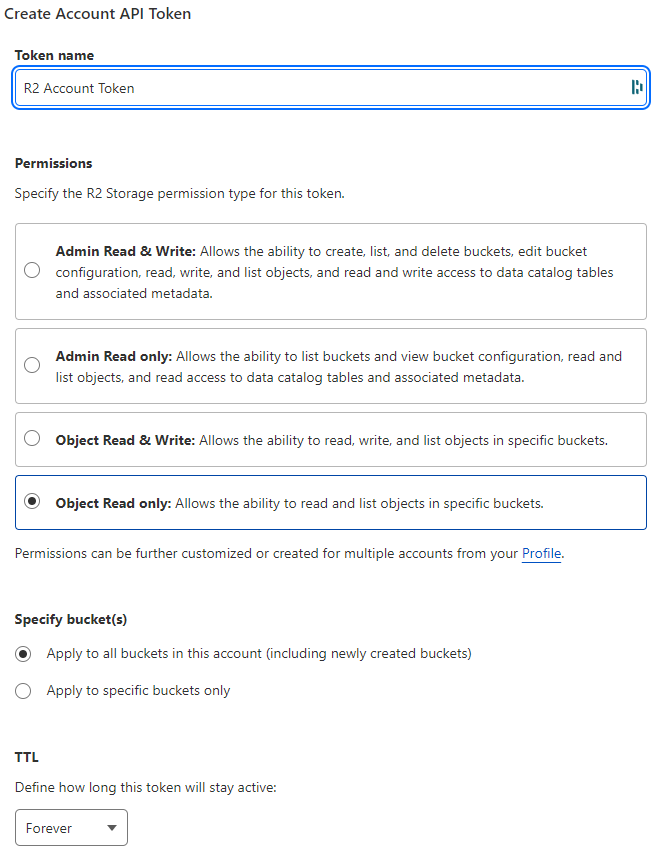
- Token name: Enter whatever name you wish, e.g. SyncBackPro
- Permissions: You must select Admin Read & Write. If you select anything else, then SyncBackPro will be unable to connect.
- TTL: We recommend leaving it at the default of Forever.
- Client IP Address Filtering: Set as appropriate, but we recommend leaving it blank initially.
- Finally, click the Create API Token button at the bottom of the window.
You will now be presented with the details that are required by SyncBackPro to connect to R2:
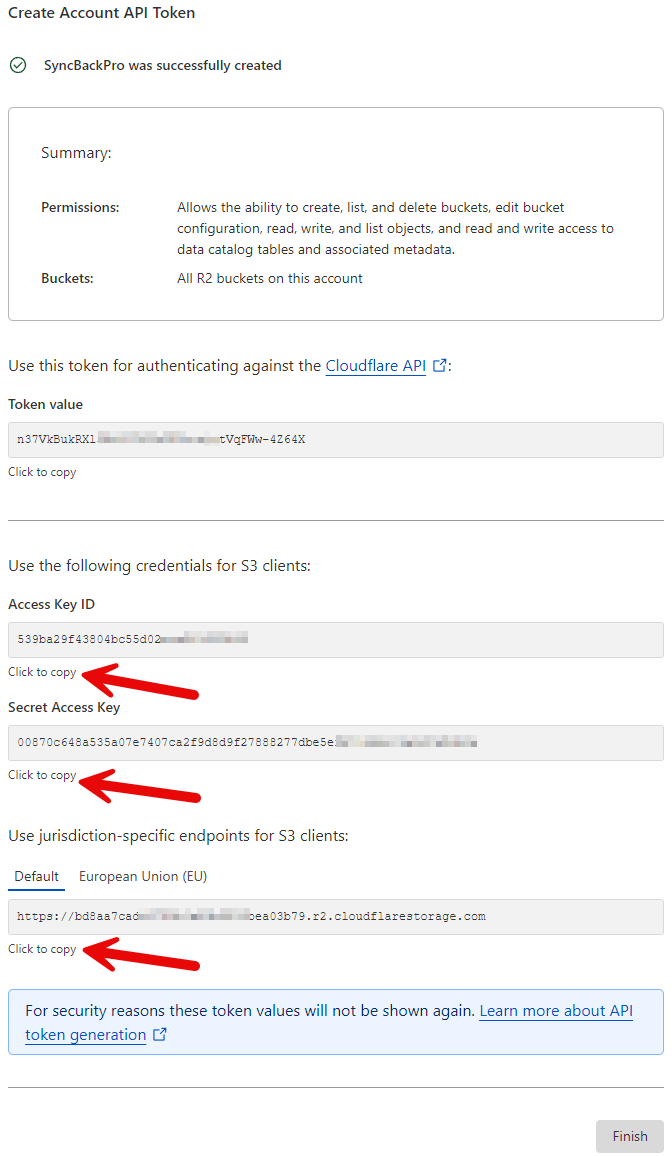 IMPORTANT: Carefully copy and paste these details to secure storage, e.g. a password manager or encrypted file. We strongly recommend using the Click to copy links on the page to copy them to the clipboard so you can paste them. Do not manually type them somewhere else because that will almost certainly result in a mistake. This is the only time these details will be shown. If you lose or forget them then you'll need to create some new ones (and update any SyncBackPro profiles that use them).
SyncBackPro needs the following details from this web page:
- Access Key ID
- Secret Access Key
- Endpoint - this is called the Service URL in SyncBackPro
- You may need the other details for other services, but SyncBackPro does not need the Token value, for example.
Once you have copied all the details, and double-checked they are correct, click the Finish button at the bottom of the web page.
SyncBackPro Setup
Download and install the latest version of SyncBackPro. Note that SyncBackSE and SyncBackFree do not support the cloud, so SyncBackPro is required. If you have not purchased SyncBackPro, then you can use it for 30 days without any restrictions.
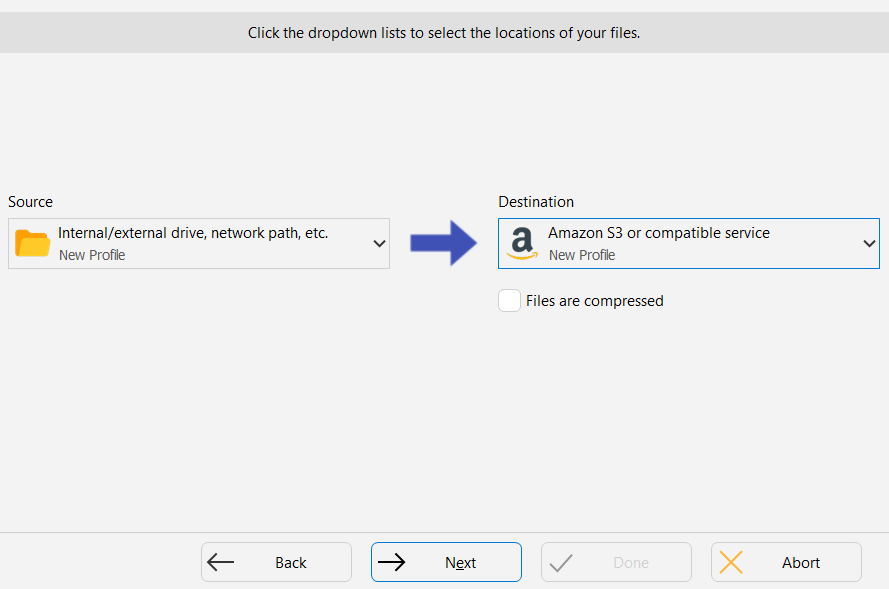
After installing and running SyncBackPro, we must create a new profile. A profile defines what files we will copy to R2 and where to store them. Create a new profile using the Profile Creation Wizard (click the New button at the bottom-left of the main window, or press Ctrl-N). Follow the on-screen prompts to provide your profile with a name and to select a profile type (Backup, Synchronize or Mirror). If you are making a backup to R2, simply select Backup.
For the location selection, click on either the Source or Destination dropdown list and select Amazon S3 or compatible service. If you are making a backup to R2, then your destination is the S3 compatible service. Cloudflare R2 is an Amazon AWS S3 compatible service. Click the Next button to proceed.
The Cloud Connection Details page is now shown:
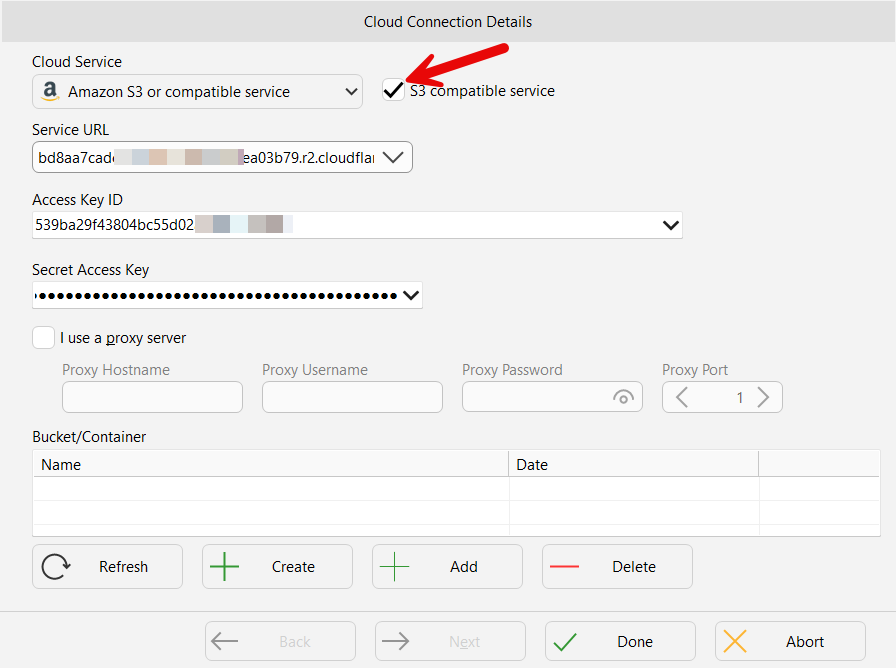
- First, tick the checkbox S3 compatible service.
- Copy and paste your Endpoint from R2 into the Service URL edit box. SyncBackPro will automatically strip off the https:// prefix.
- Copy and paste your R2 Access Key ID
- Copy and paste your R2 Secret Access Key
If you're behind a firewall, ensure outbound access to *.r2.cloudflarestorage.com is allowed. To get a list of your R2 buckets, and select the one you want SyncBackPro to use, click the Refresh button. Select a bucket then click Done. The Profile Setup window will now appear. You can now choose the Source (where to copy your files from) and configure the profile as you wish.
Once you've created your profile, do a Simulate Run to make sure it is doing what you want it to do.
Conclusion
Cloudflare R2, combined with SyncBackPro, offers a powerful, flexible, and low-cost cloud backup solution. With SyncBackPro's scheduling, encryption, and versioning, your data is secure and under your control.