
Creating Gmail client ID and secret
Although you can use application passwords with Gmail (to email logs or backup your email) you may want to instead use the more secure OAuth method. To do this you must first create a unique client ID and client password. Think of these as usernames and passwords, so instead of entering your real username and password into an application (like SyncBack) you can instead use the client ID and client password.
This process is similar to creating a client ID and password for GDrive, with the difference being the scopes that are used. Scopes define what can be done by the application that uses the client ID and password. SyncBack requires four scopes for use with Gmail:
- .../auth/userinfo.email (a non-sensitive scope, required to see your primary Google Account email address)
- .../auth/userinfo.profile (a non-sensitive scope, required to see your personal info, including any personal info you've made publicly available)
- .../auth/gmail.send (a sensitive scope, required to send email on your behalf)
- https://mail.google.com/ (a restricted scope, required to read, compose, send, and permanently delete all your email from Gmail)
The Steps
Although it looks overwhelming, it is relatively simple to give SyncBack access to Gmail:
- First we create a project and give it a name.
- Next we tell Google we want this project to use Gmail and we will authorize using OAuth.
- We then define what access SyncBack has to Gmail by specifying the Scopes it will require.
- To limit access, we define which Users can connect by adding their email addresses to the project.
- Finally we Publish it, which basically means it is made available for you to use.
- When SyncBack first connects to Gmail using this project, you will need to approve it.
Creating a Project
First, we must create a project:
- Go to the Google Developers Console: https://console.cloud.google.com/
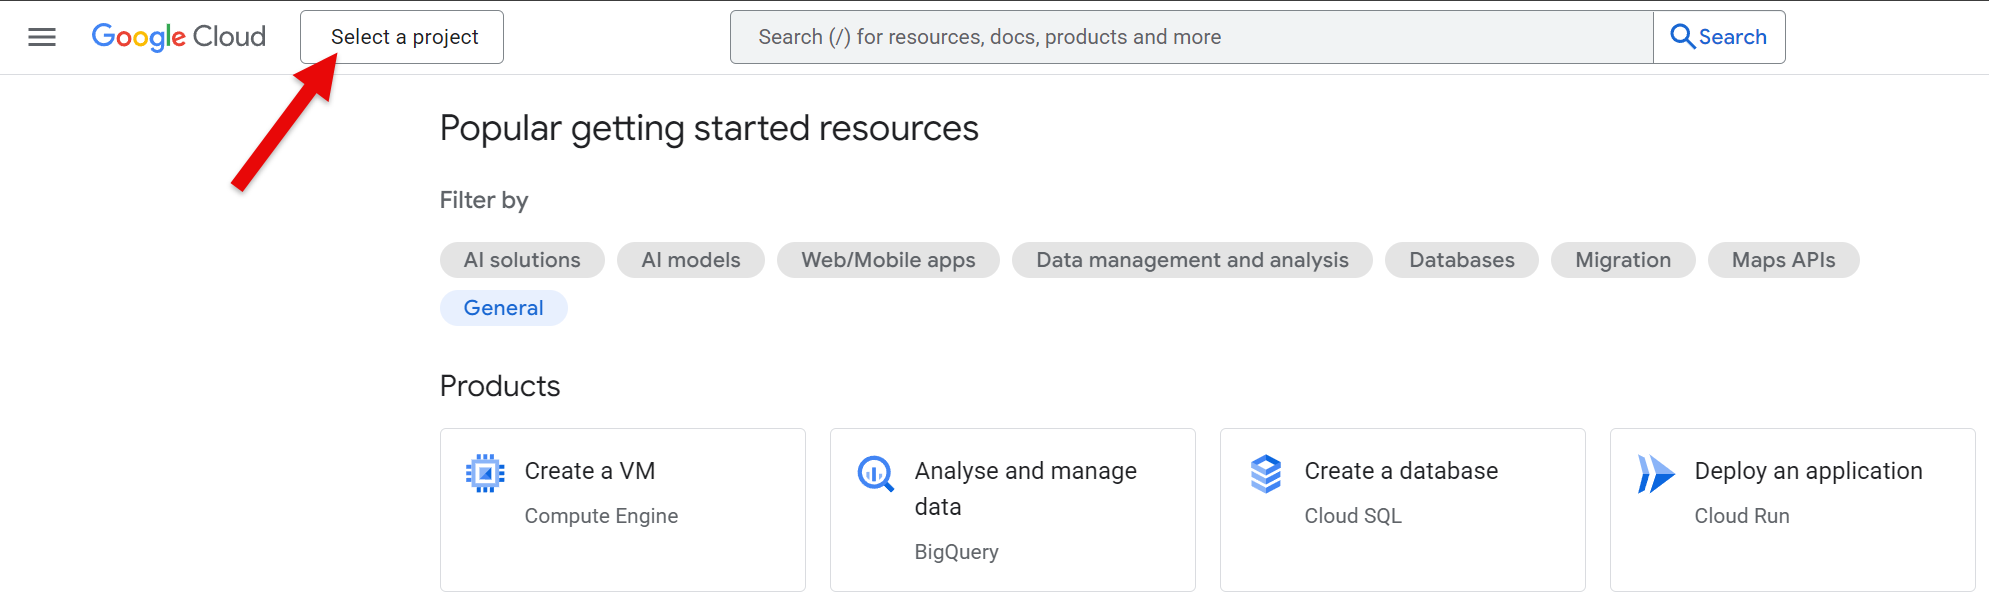
- Click the Select a project drop-down menu on the top-left corner of the page. A pop-up window appears on the screen.
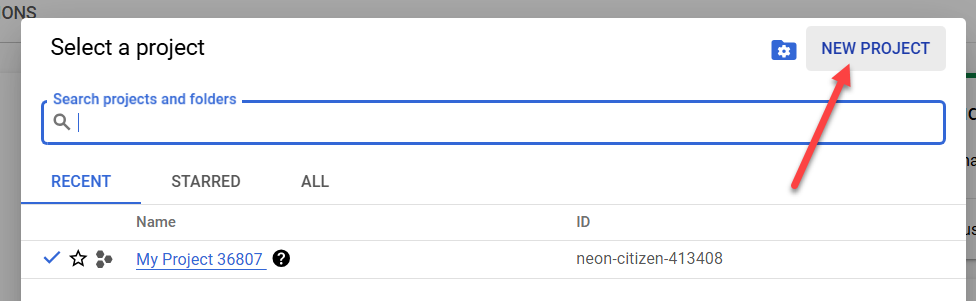
- Click New project on the top-right of the pop-up window.
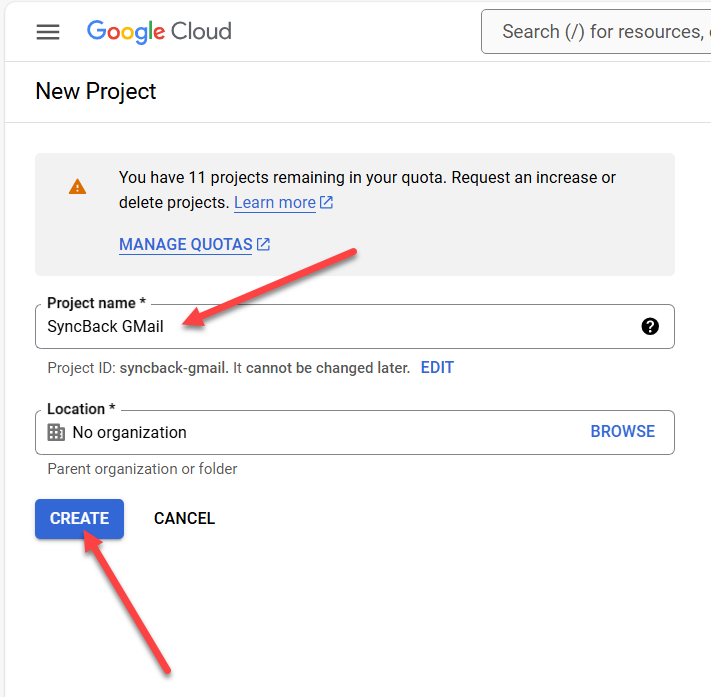
- Enter a Project name, e.g. SyncBack Gmail, then click the Create button. It may take a while for the project to be created.
OAuth
Now we have a project we must state that it is for Gmail access and SyncBack will authenticate with using OAuth:
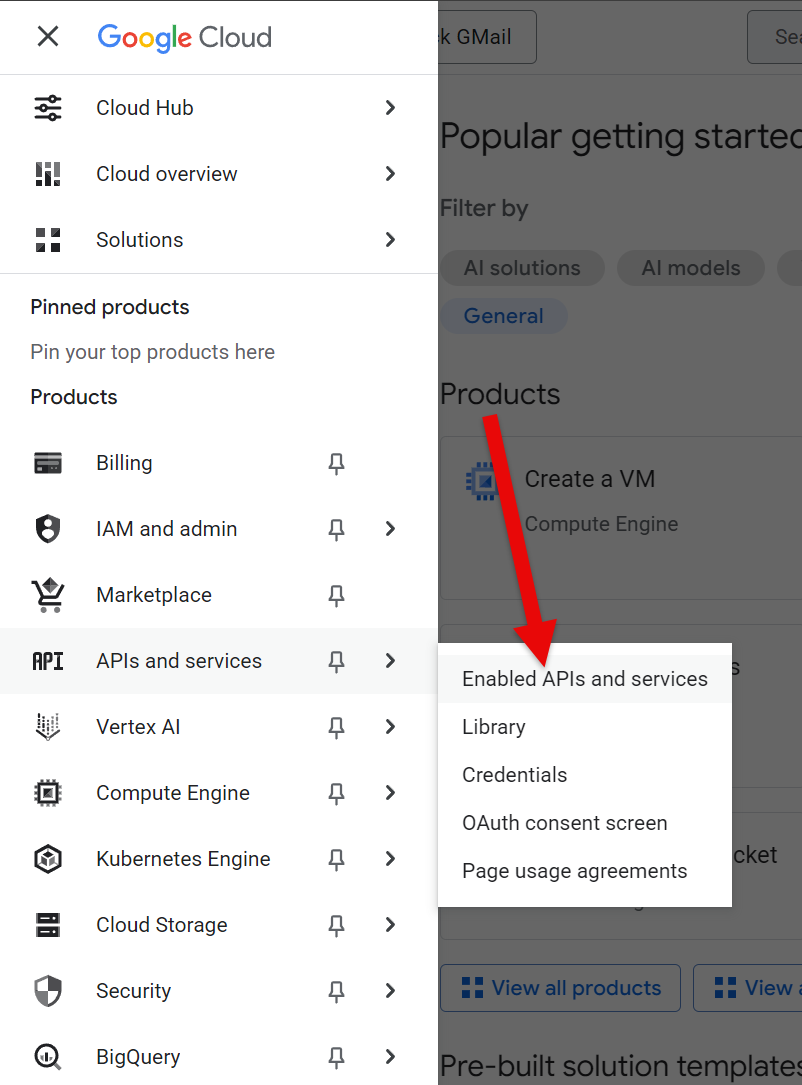
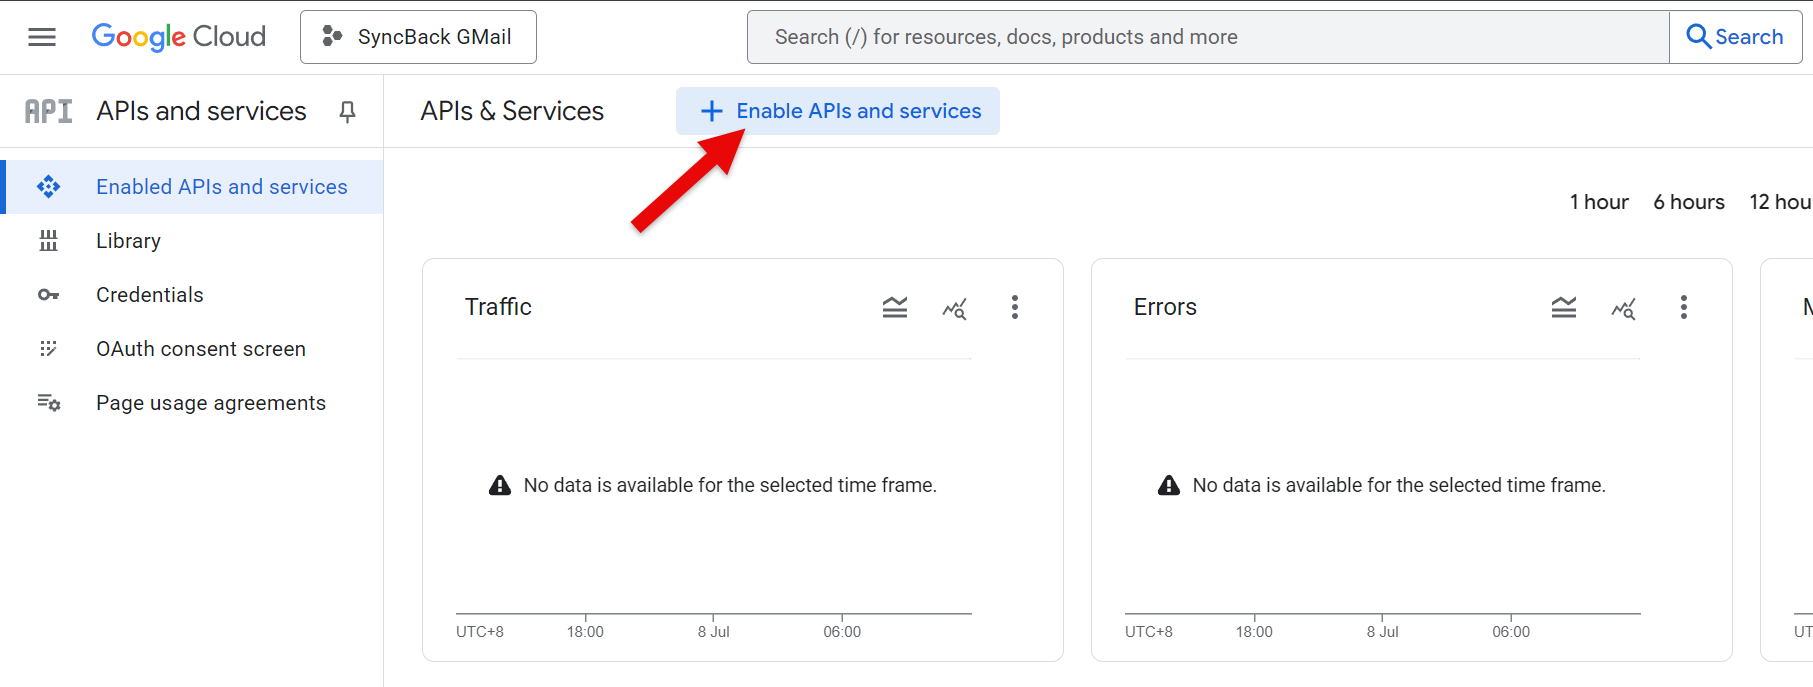
- Click the burger menu on the top-left of the window and select Enabled APIs & services.
- Click + Enable APIs and services at the top of the window.
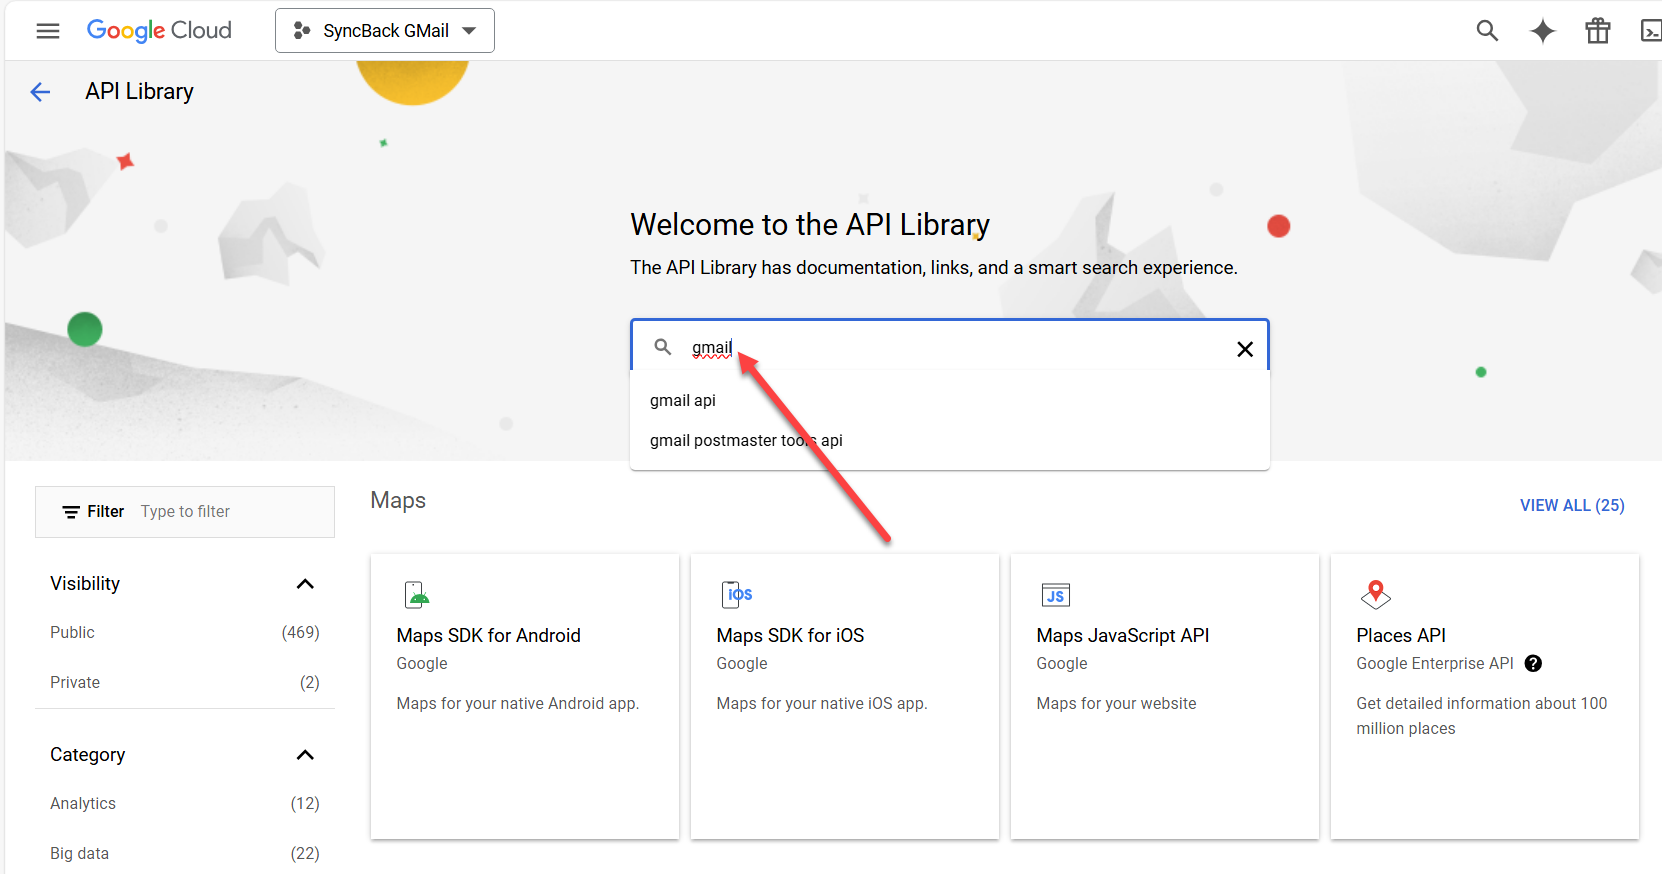
- Enter gmail into the search box and press Enter
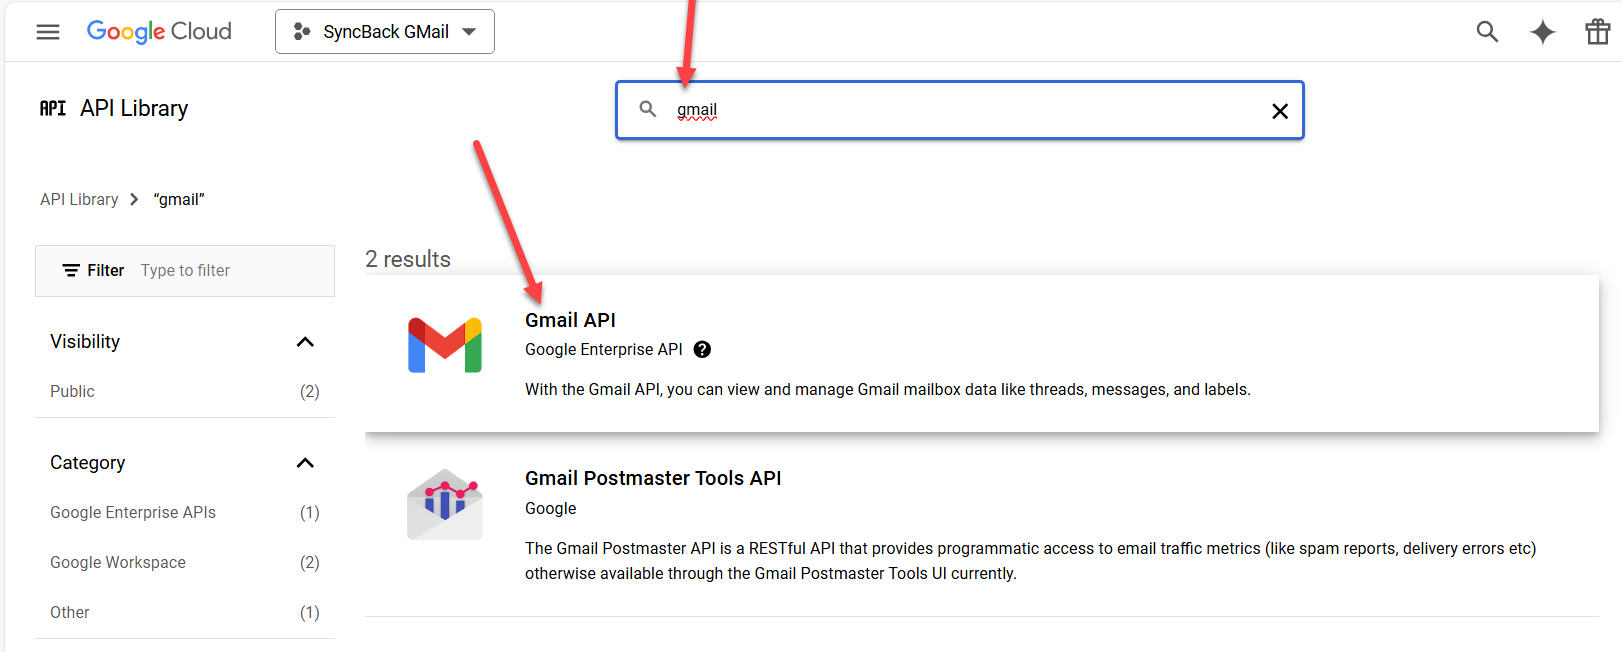
- Click the Gmail API box...
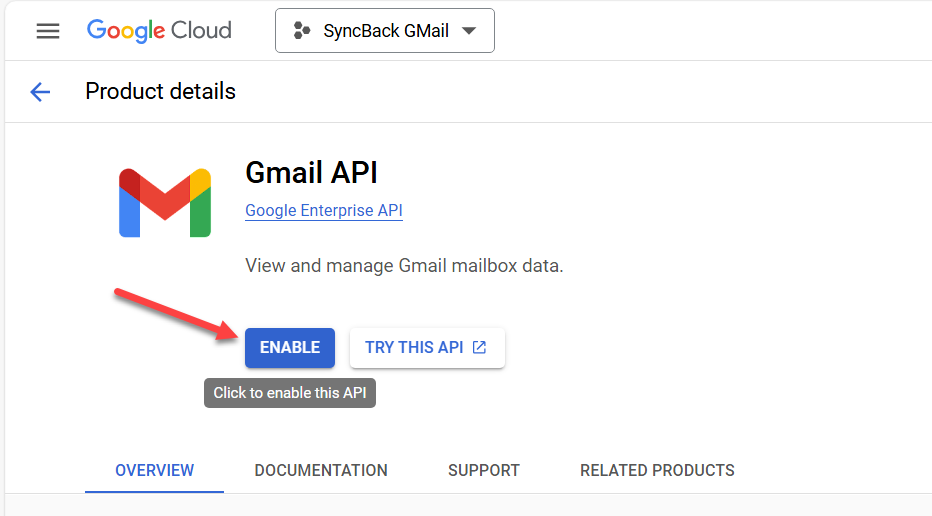
- ...then click the ENABLE button. It may take a few moments to enable it.
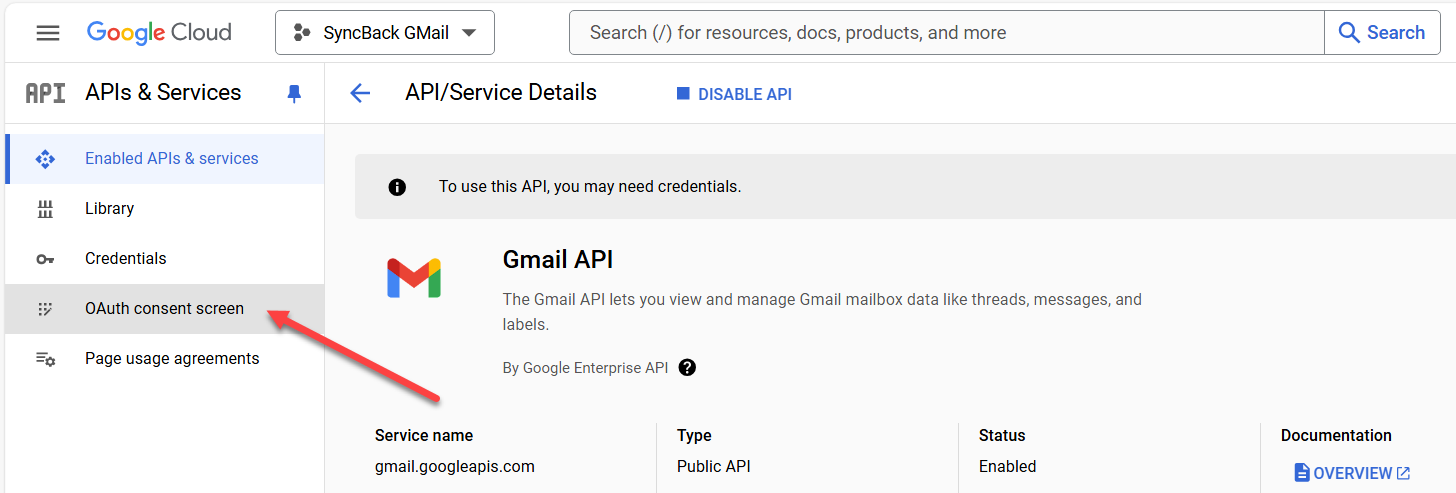
- Once enabled, click OAuth consent screen on the left of the window.
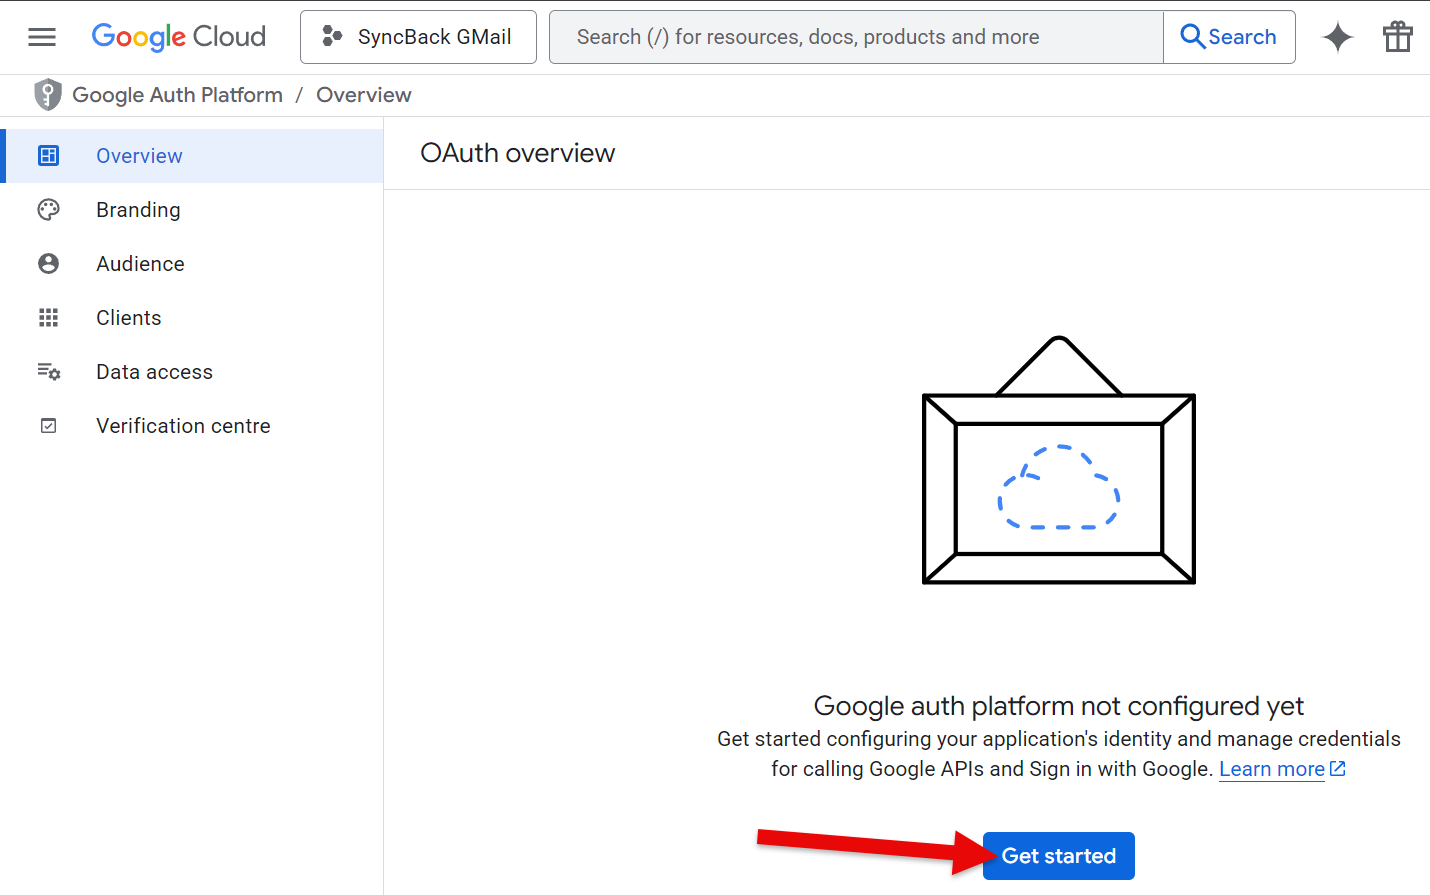
- The OAuth overview screen will eventually appear. Click the Get started button
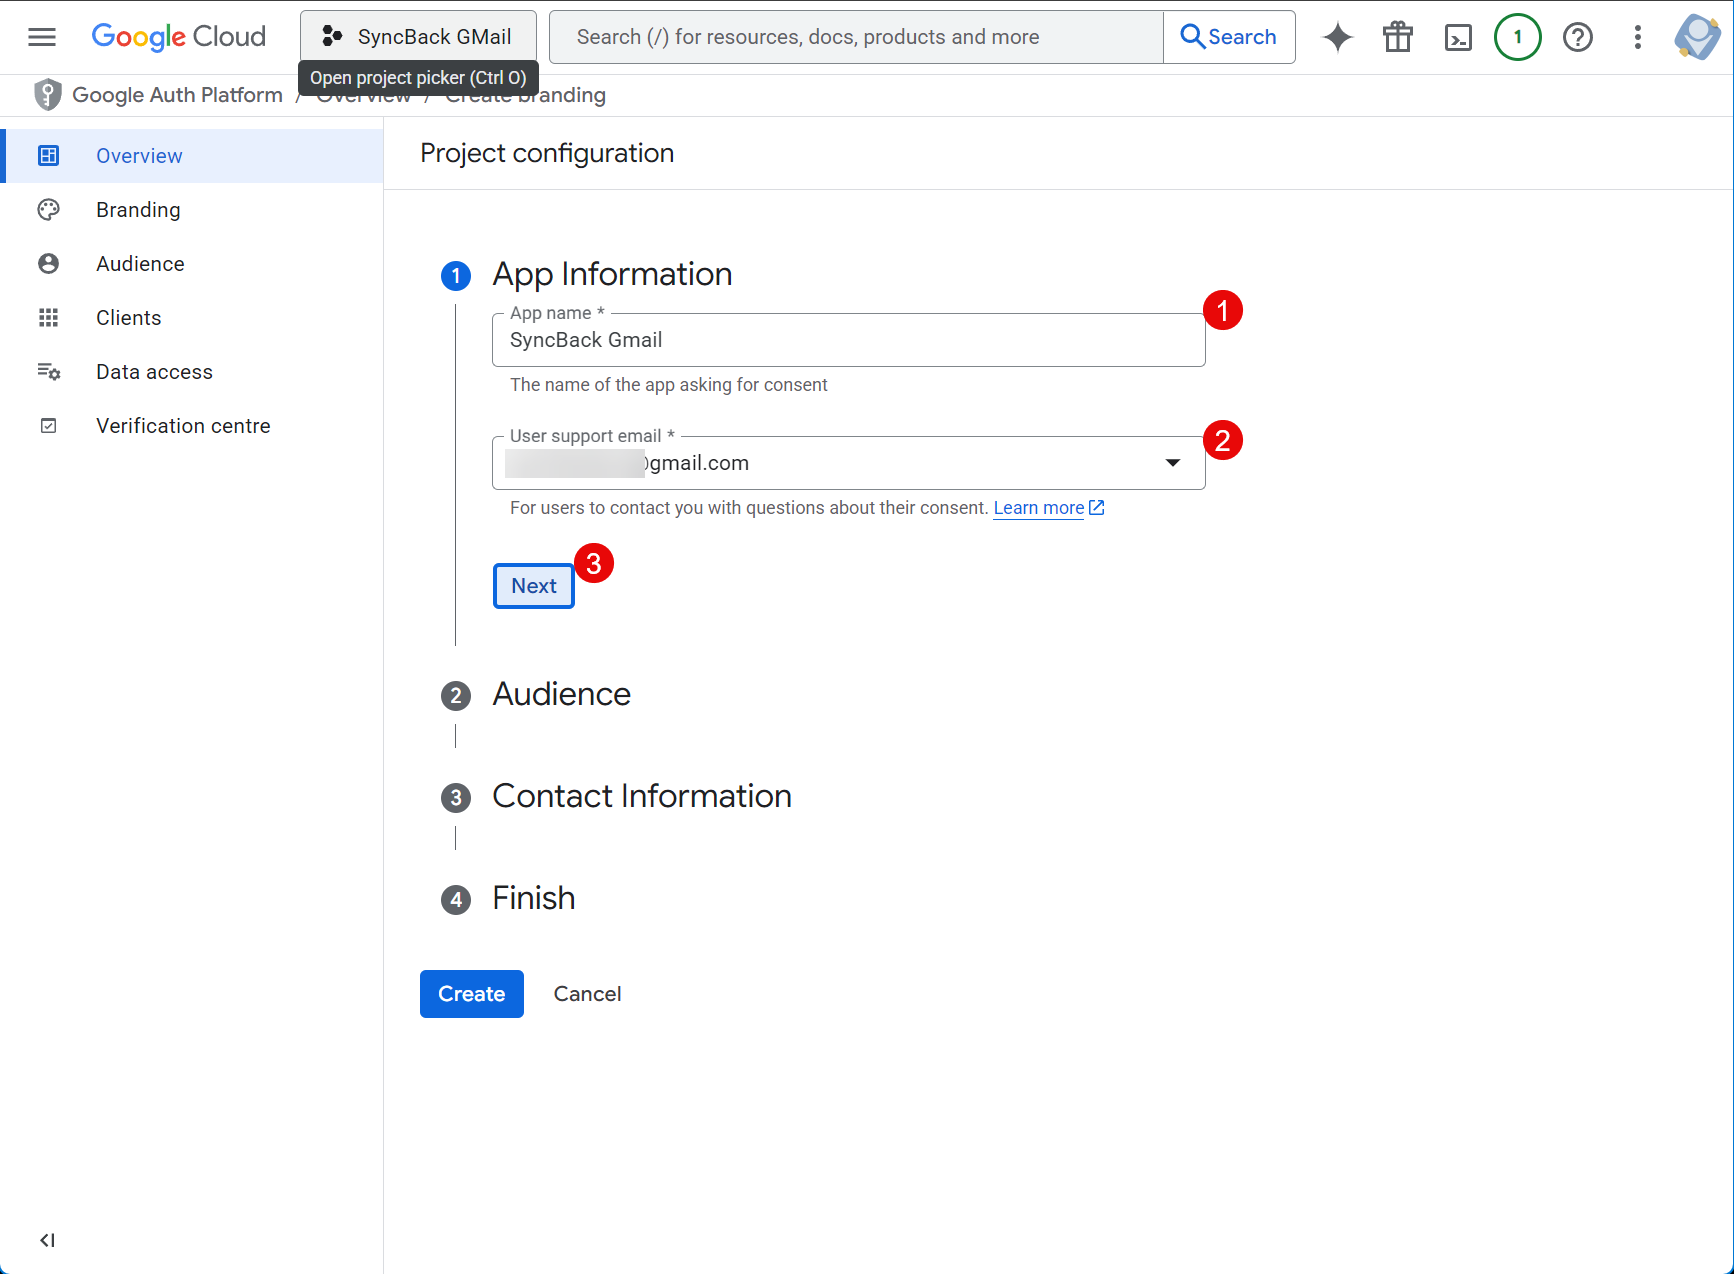
- Enter an app name, e.g. SyncBack Gmail, and use your own Gmail email address for the user support email, then click the Next button.
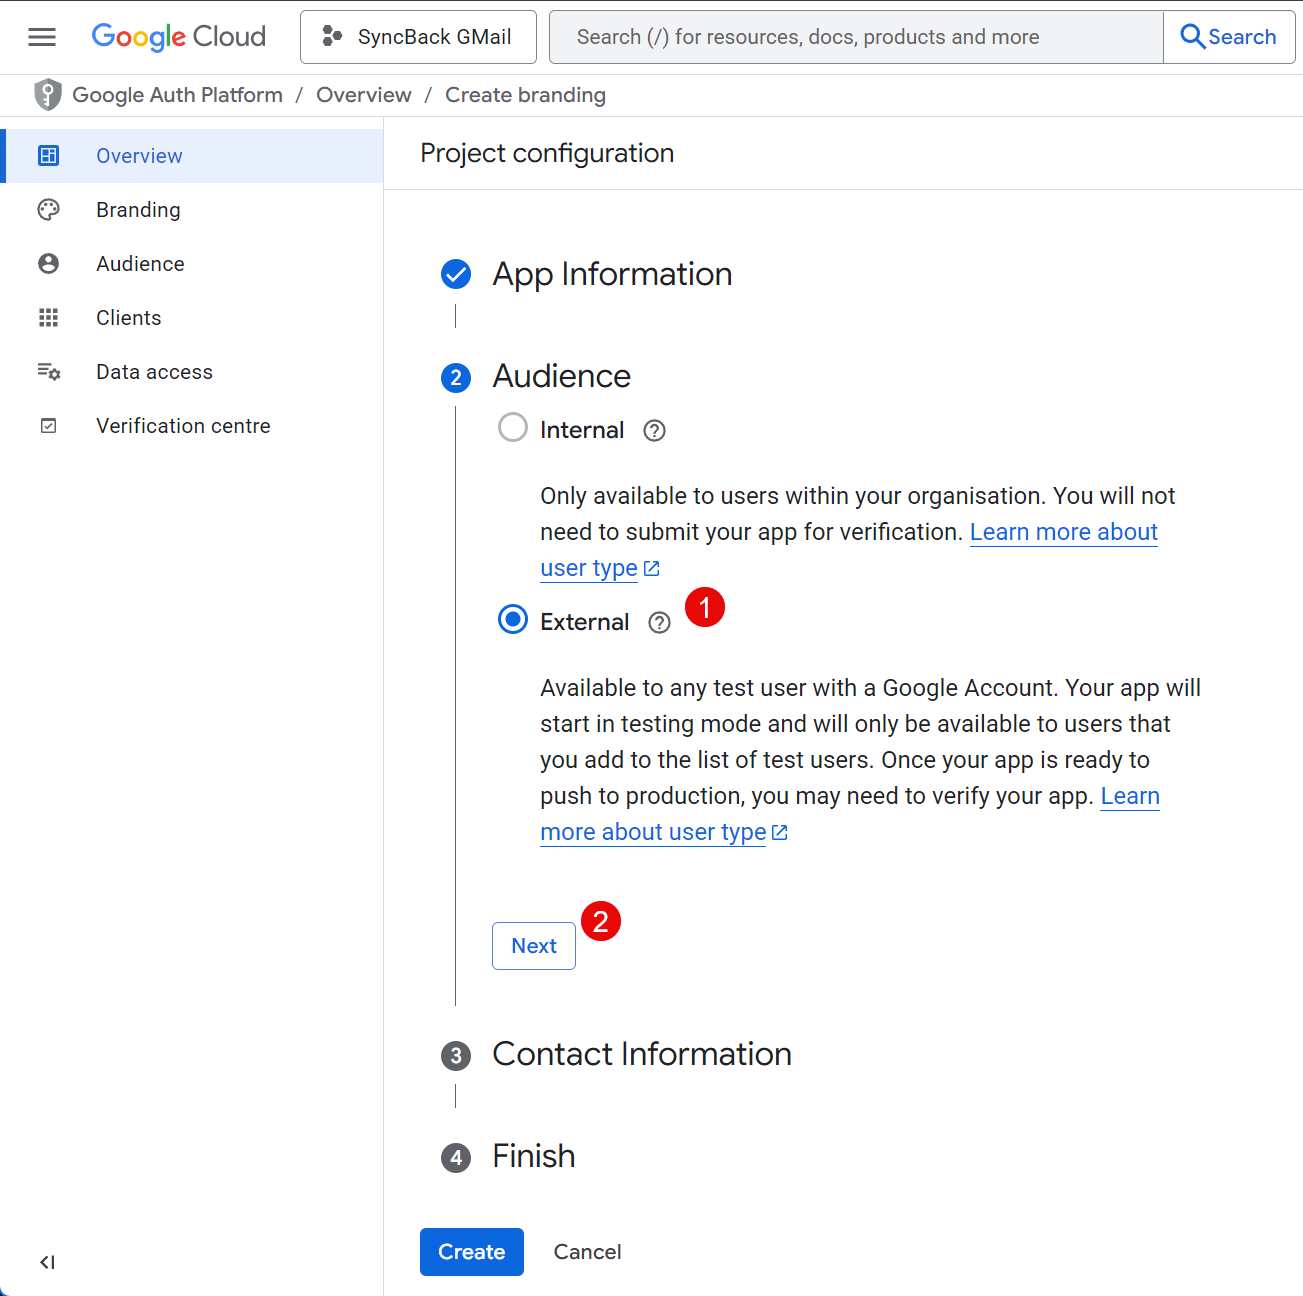
- Set the Audience as External then click the Next button.
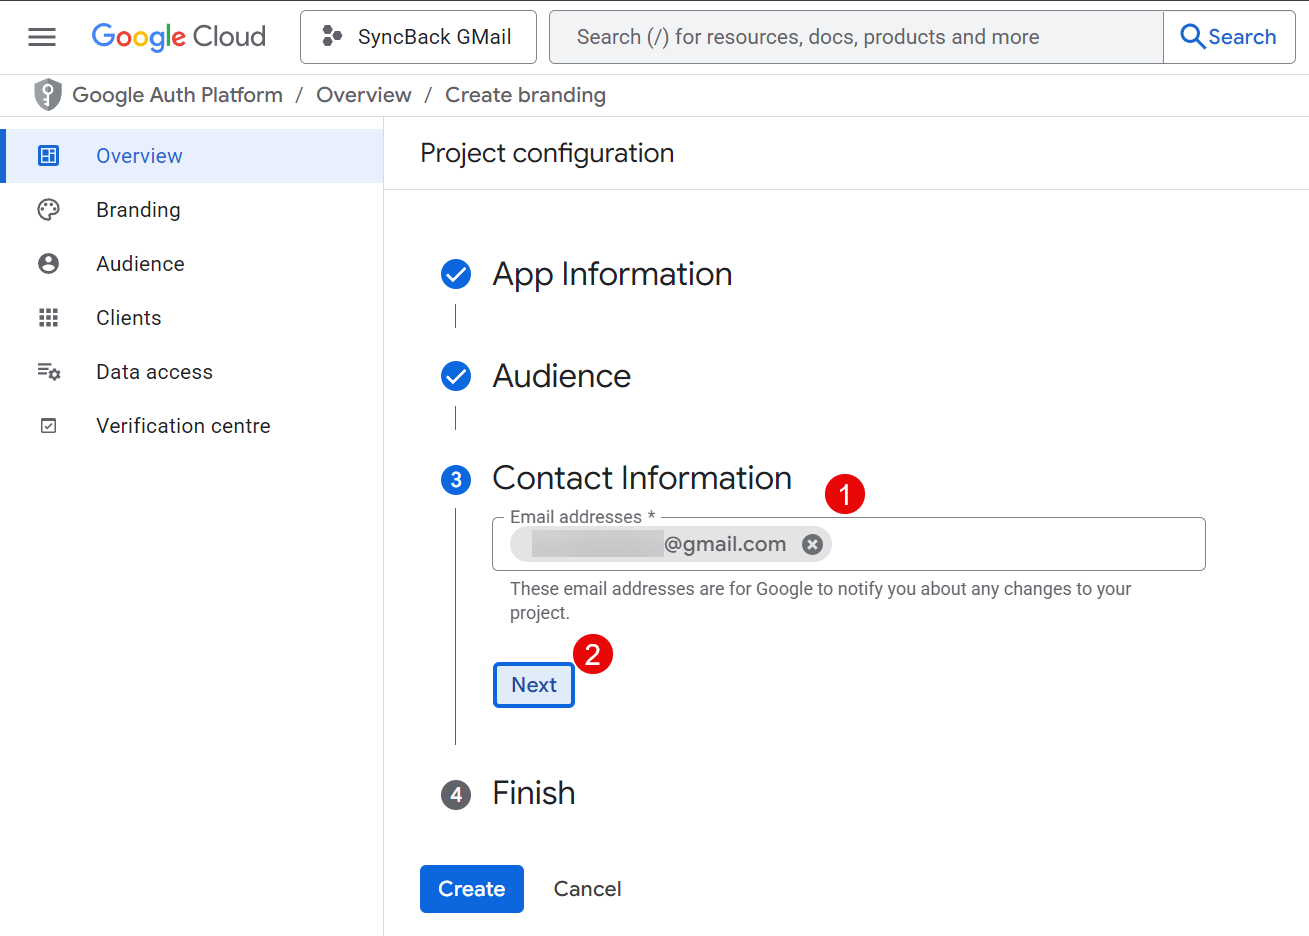
- Use your own Gmail email address for the contact information then click the Next button.
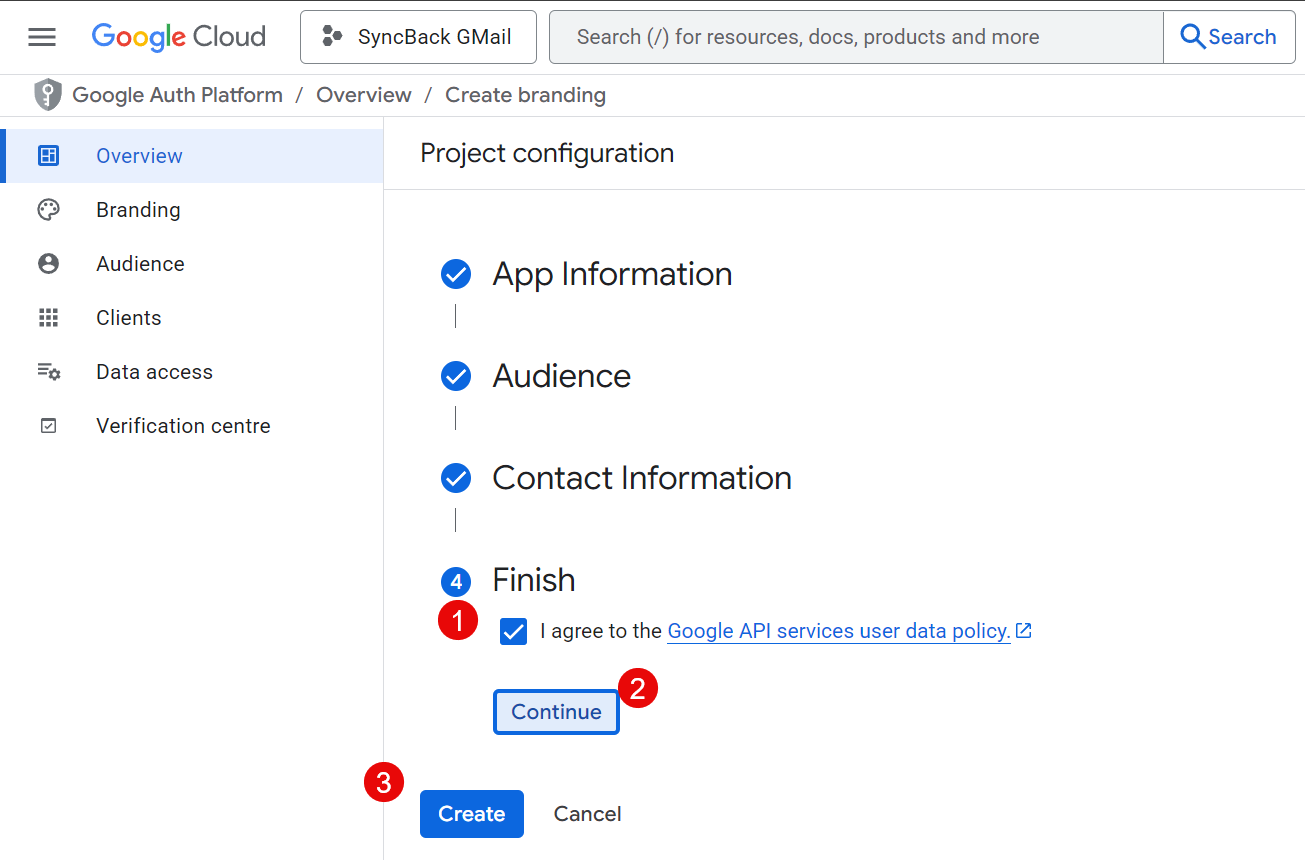
- Tick the agreement checkbox then click the Continue button followed by the Create button. It will take a few moments to process.
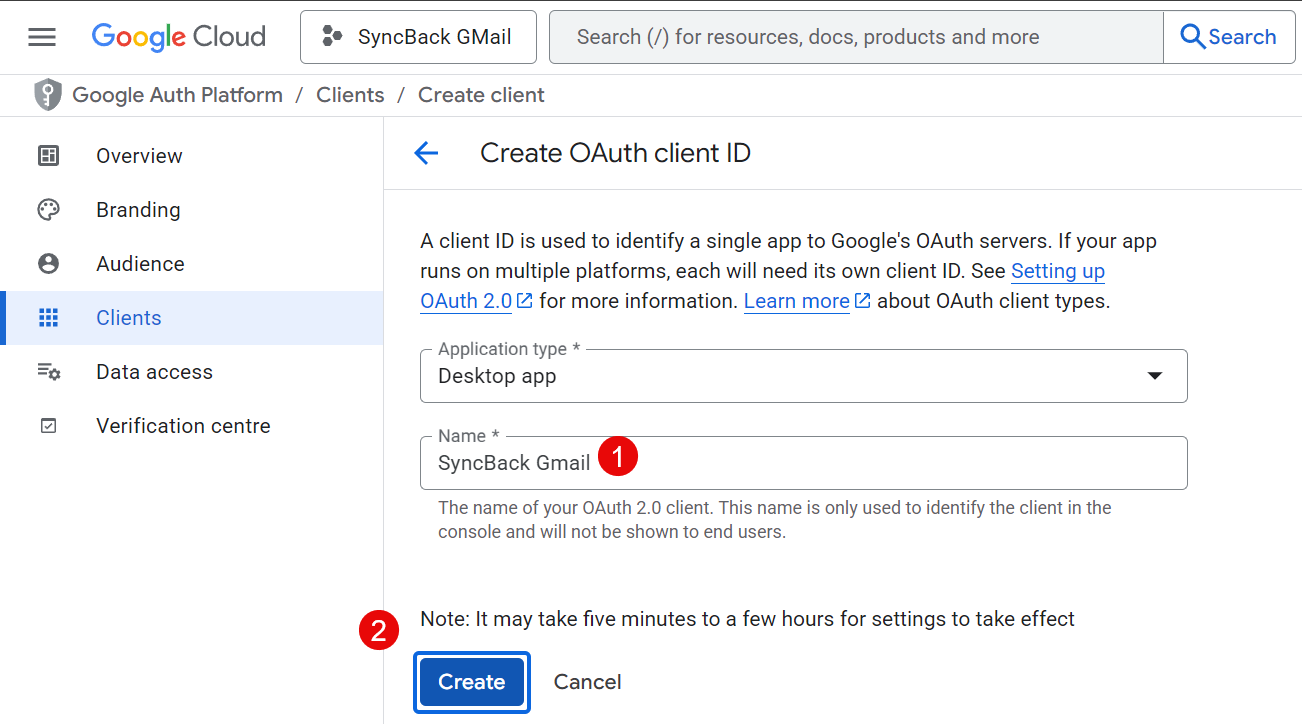
- Click the Create OAuth client button.

- For the Application type select Desktop app

- Enter a Name, e.g. SyncBack Gmail, then click the Create button.
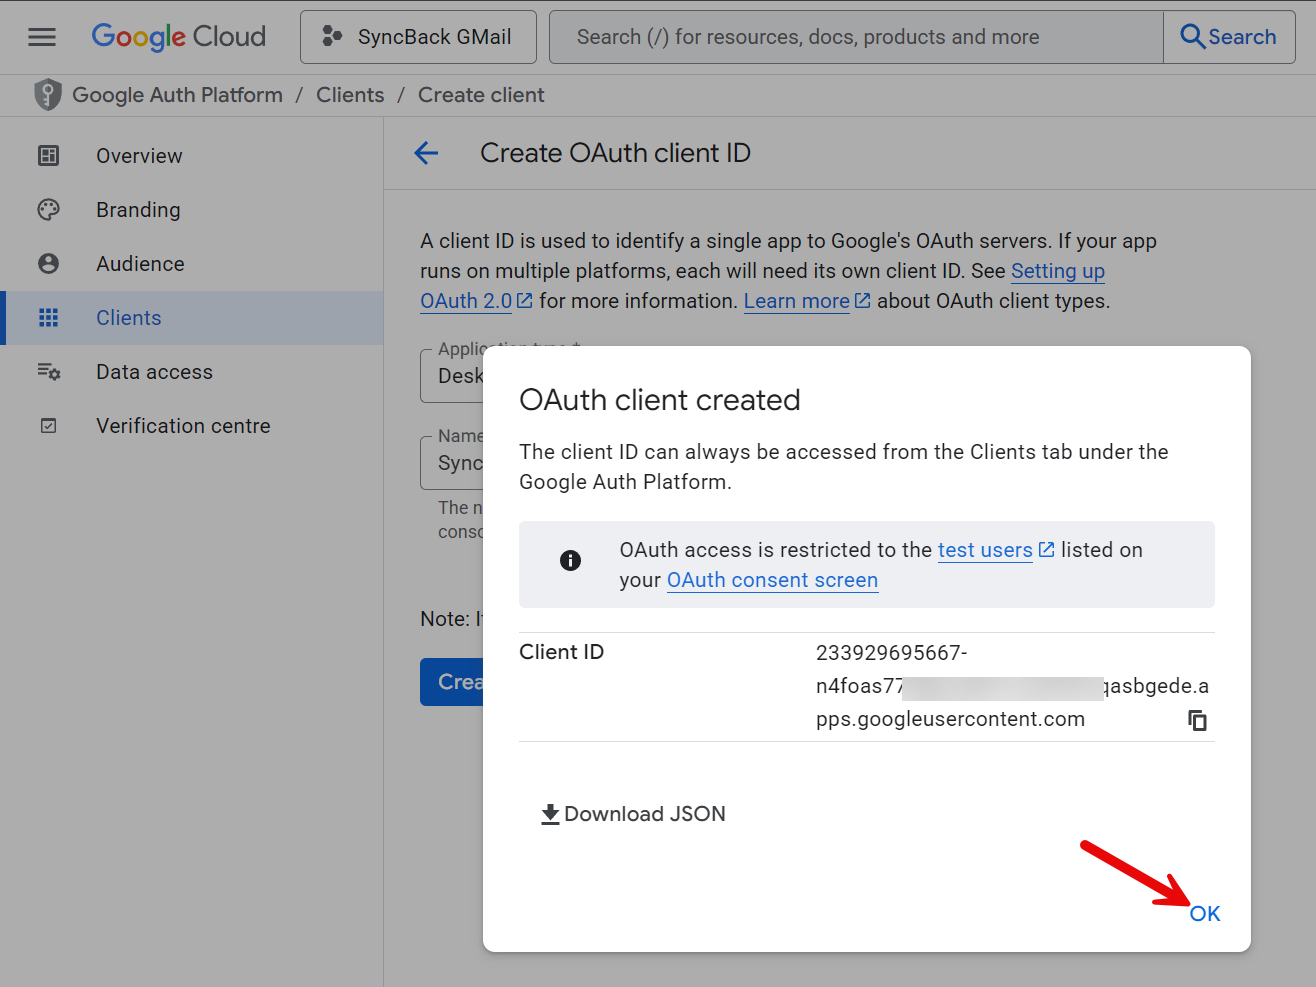
- Once it has been created, a pop-up window will appear with details. Click the OK button to continue.
Scopes
We now configure what access SyncBack will have to Gmail. This is done by using Scopes:
- Select Data access in the menu on the left of the window, then click the Add or remove scopes button. A new window appears on the right side of the screen.

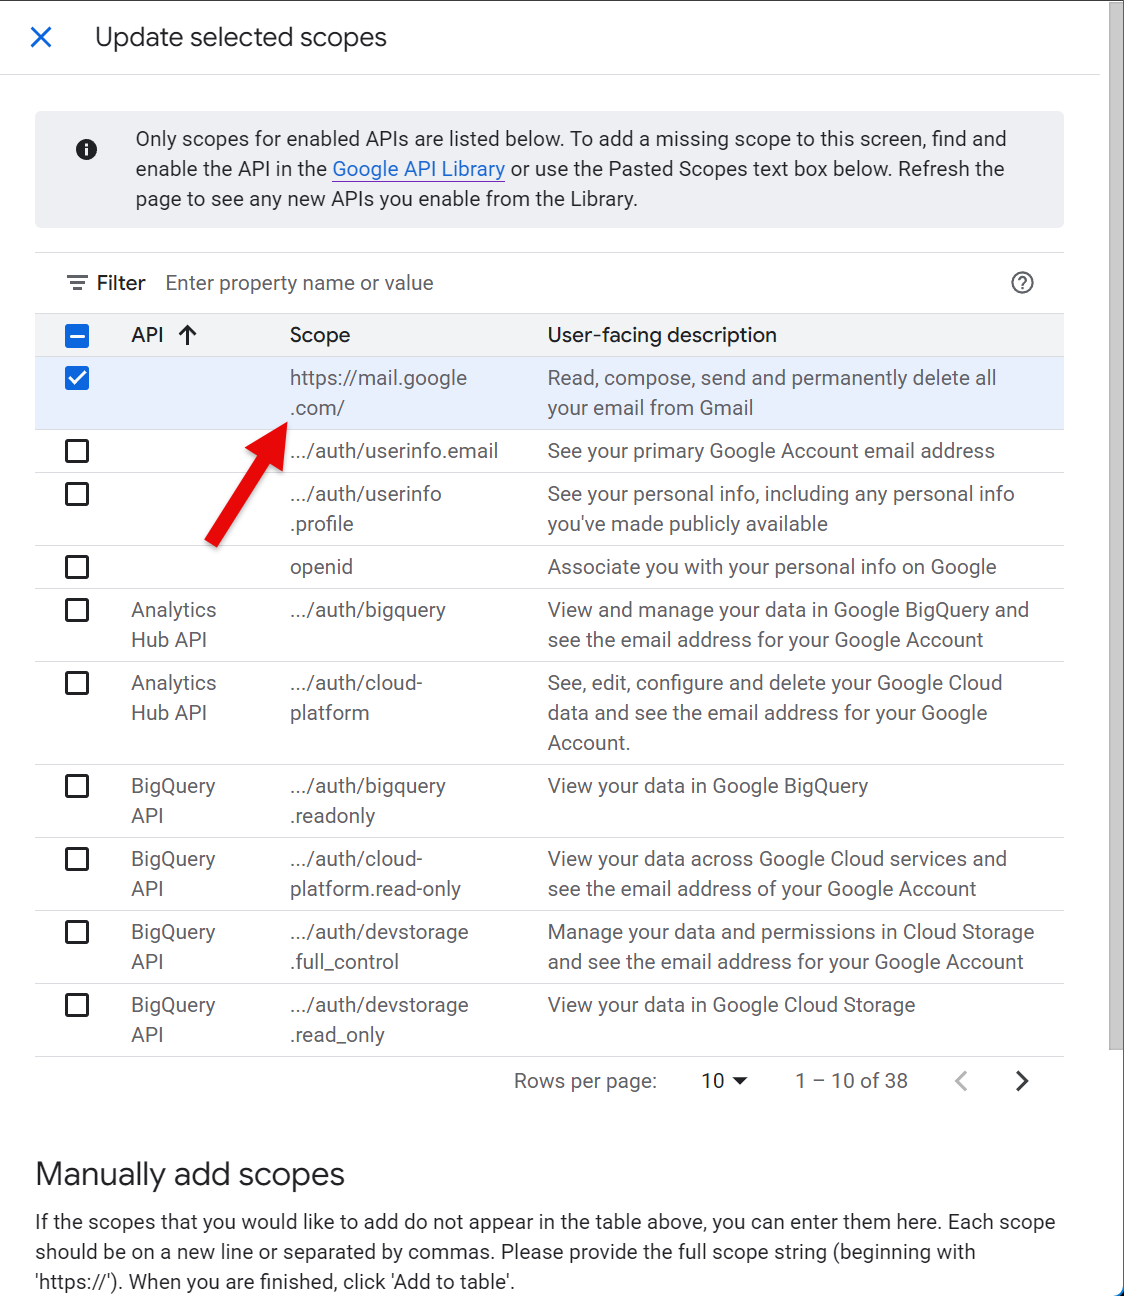
- You may need to scroll down to the Manually add scopes section. Add https://mail.google.com under the Manually add scopes section. Click the Add to table button.

- The newly added entry is displayed on the Filter table (you may need to scroll up).
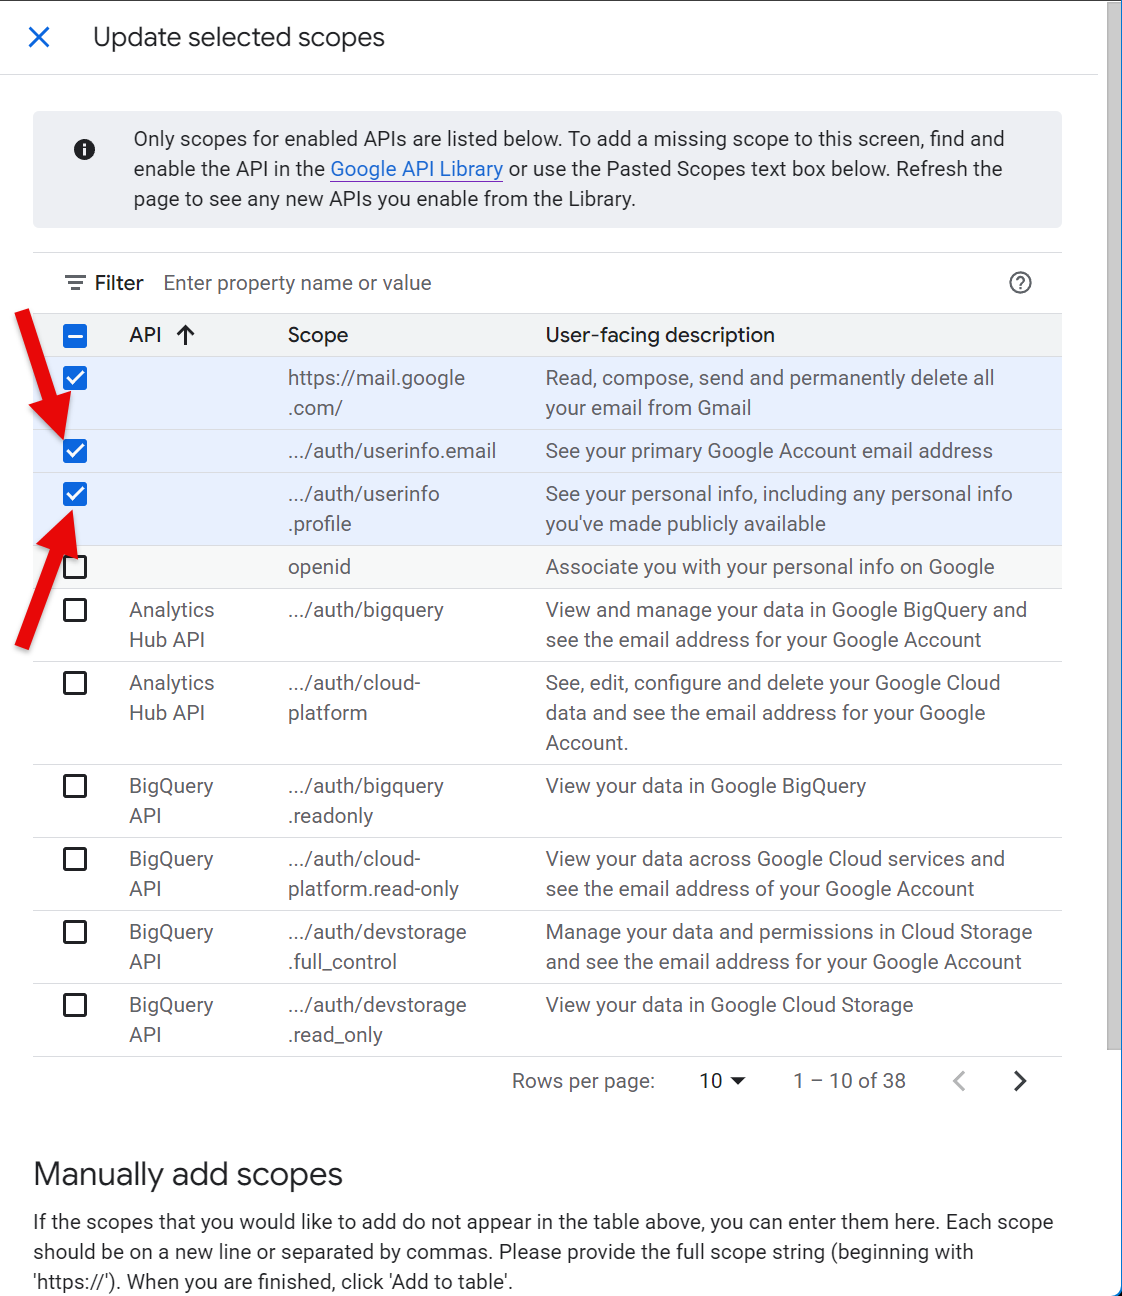
- In the Filter table, tick the userinfo.email and userinfo.profile checkboxes.
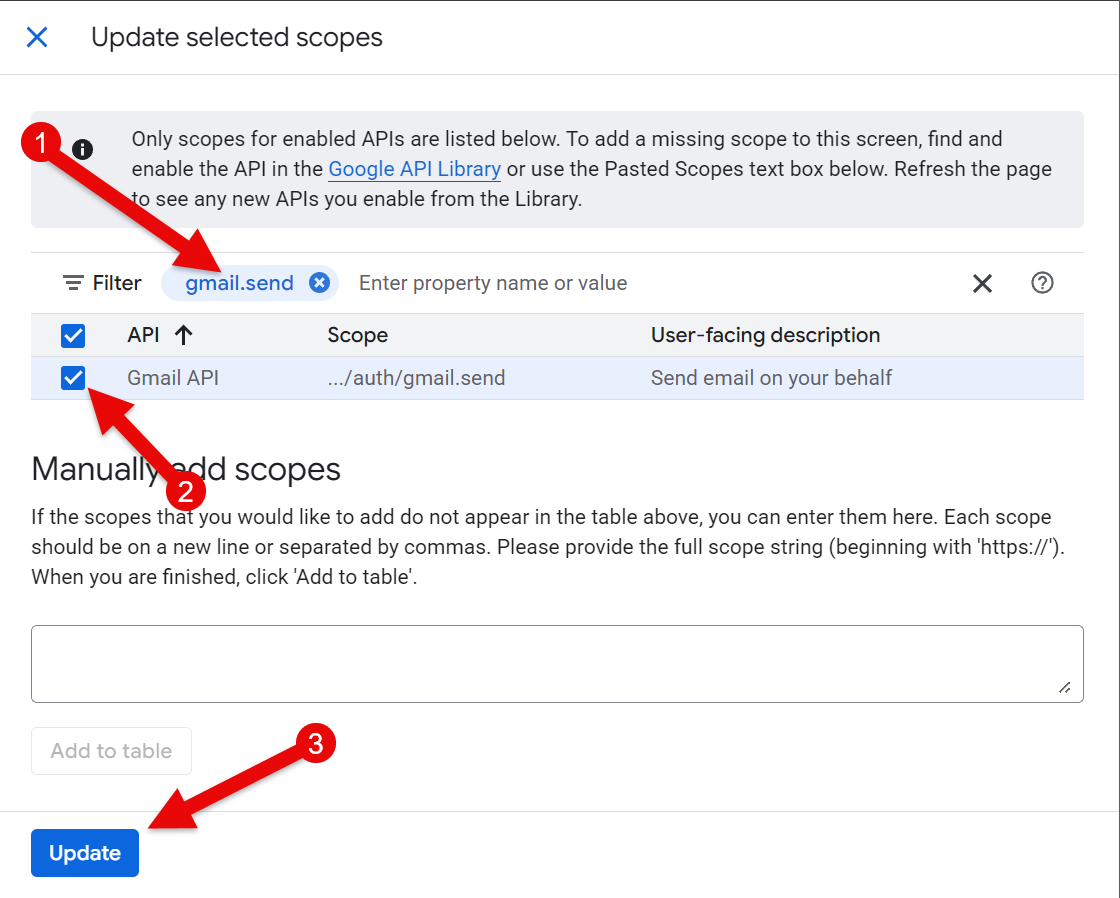
- In the Enter property name or value edit box, enter gmail.send and press Enter. Tick the Gmail API checkbox then click the Update button at the bottom.
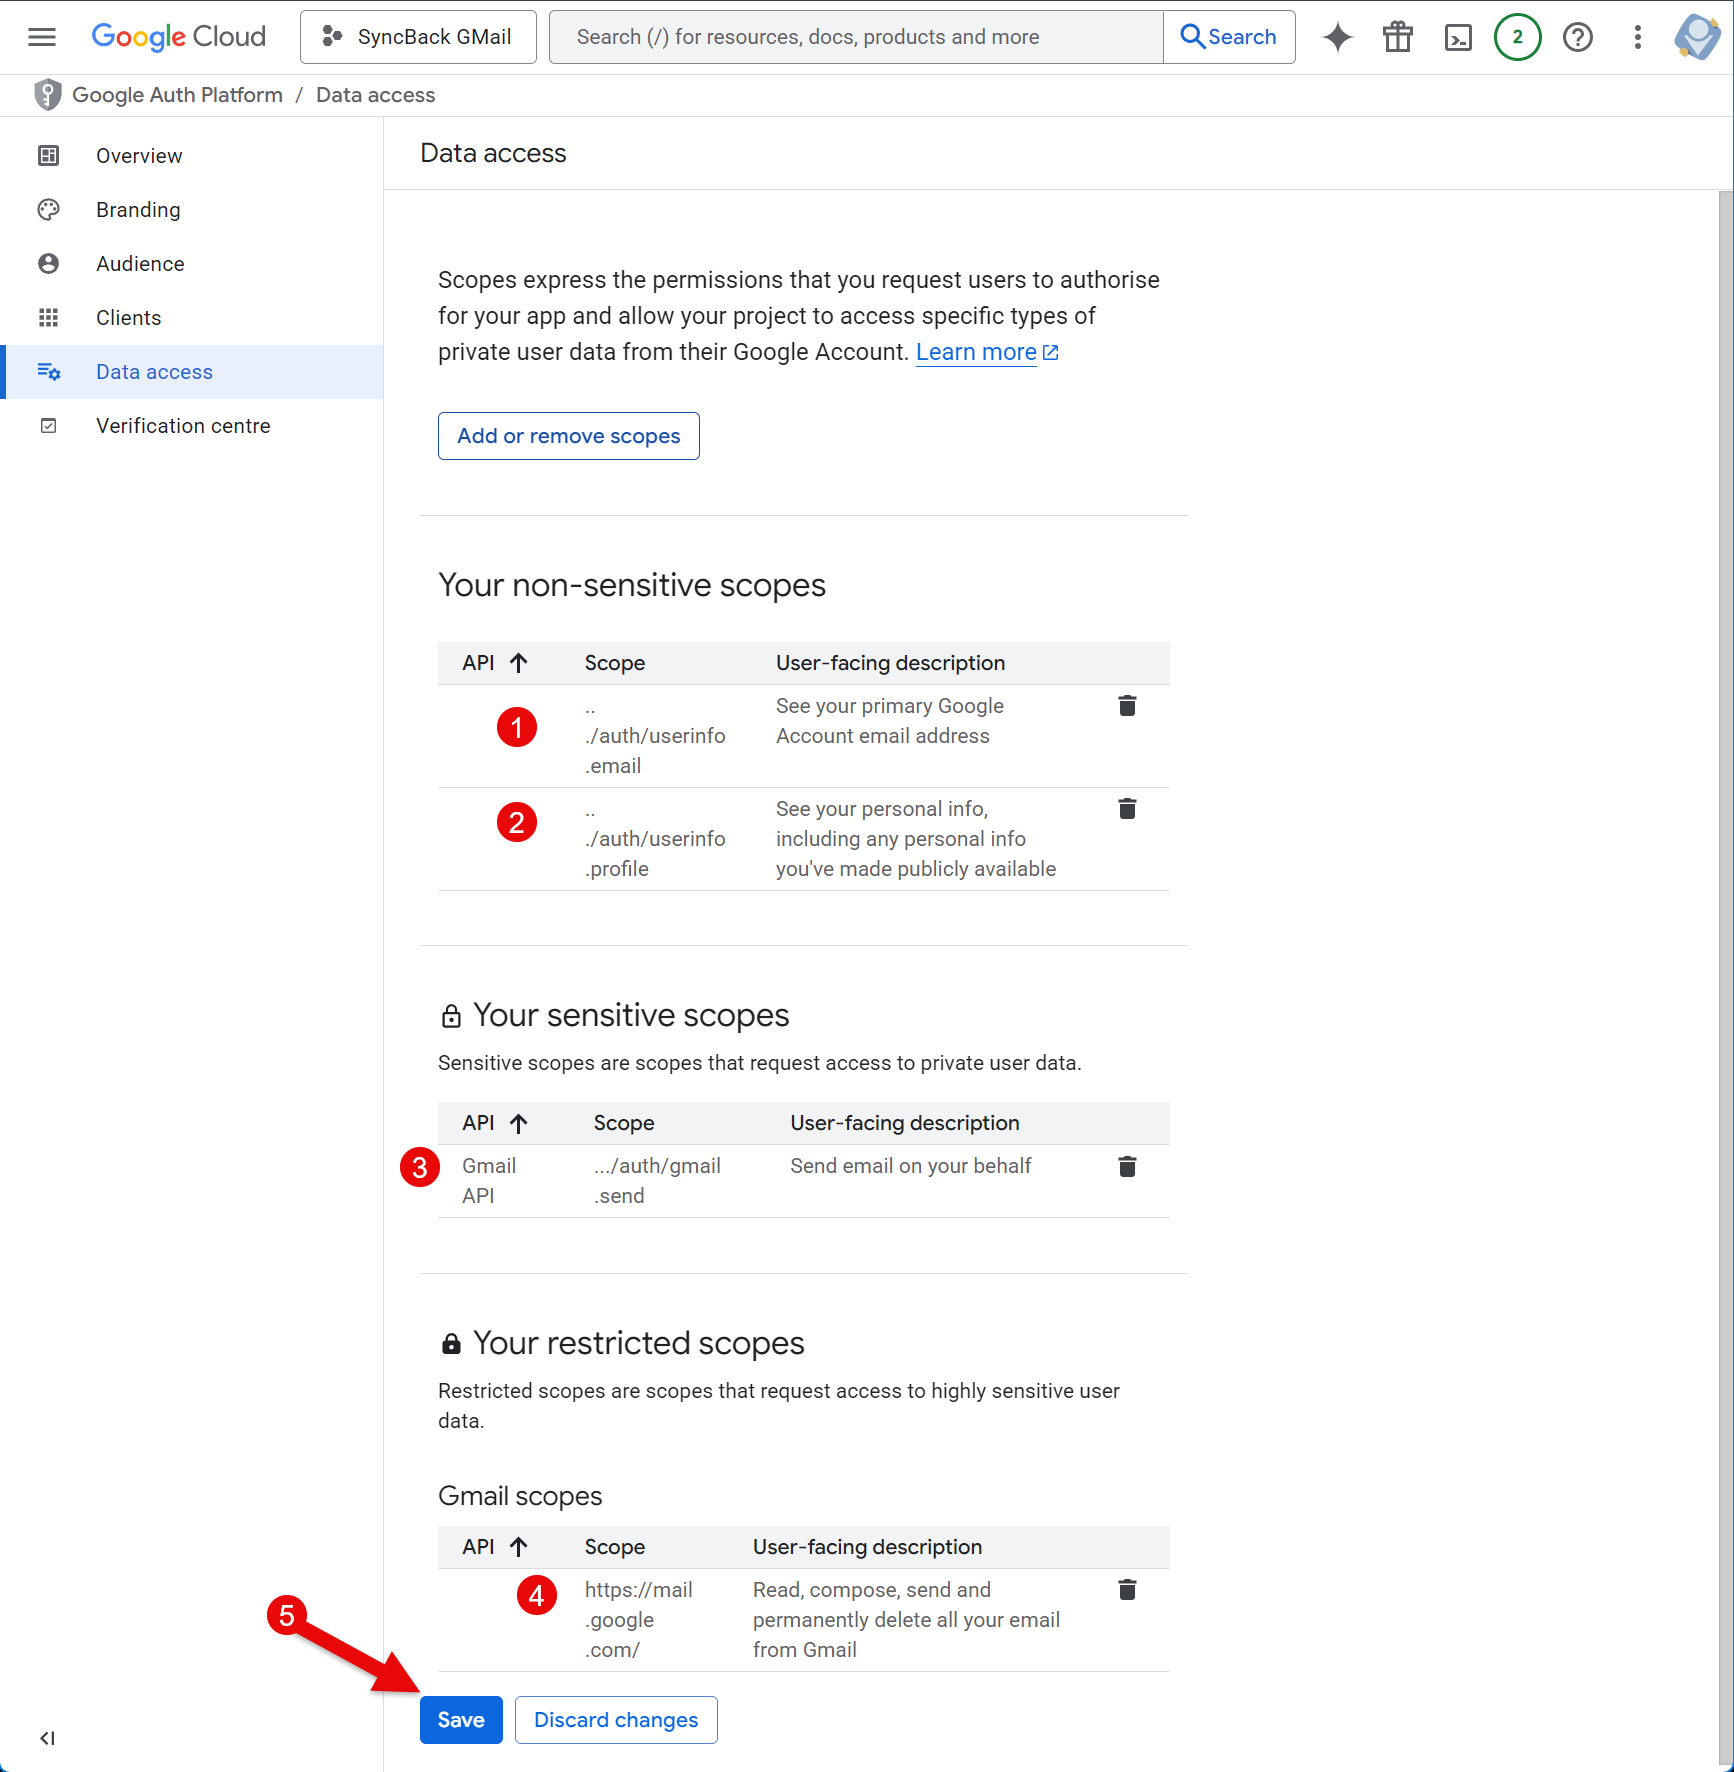
- You should see four scopes listed: userinfo.email and userinfo.profile in Your non-sensitive scopes, Gmail API in Your sensitive scopes, and https://mail.google.com in Your restricted scopes. It is critically important those four scopes are there. If not, repeat the steps above. If all four are listed, click the Save button at the bottom of the window. It may take a few moments to save.
Users
Now we need to define which users can use this project. If you don't add the Gmail email addresses you want to use then this will not work:
- Select Audience from the menu on the left of the window and click + Add users
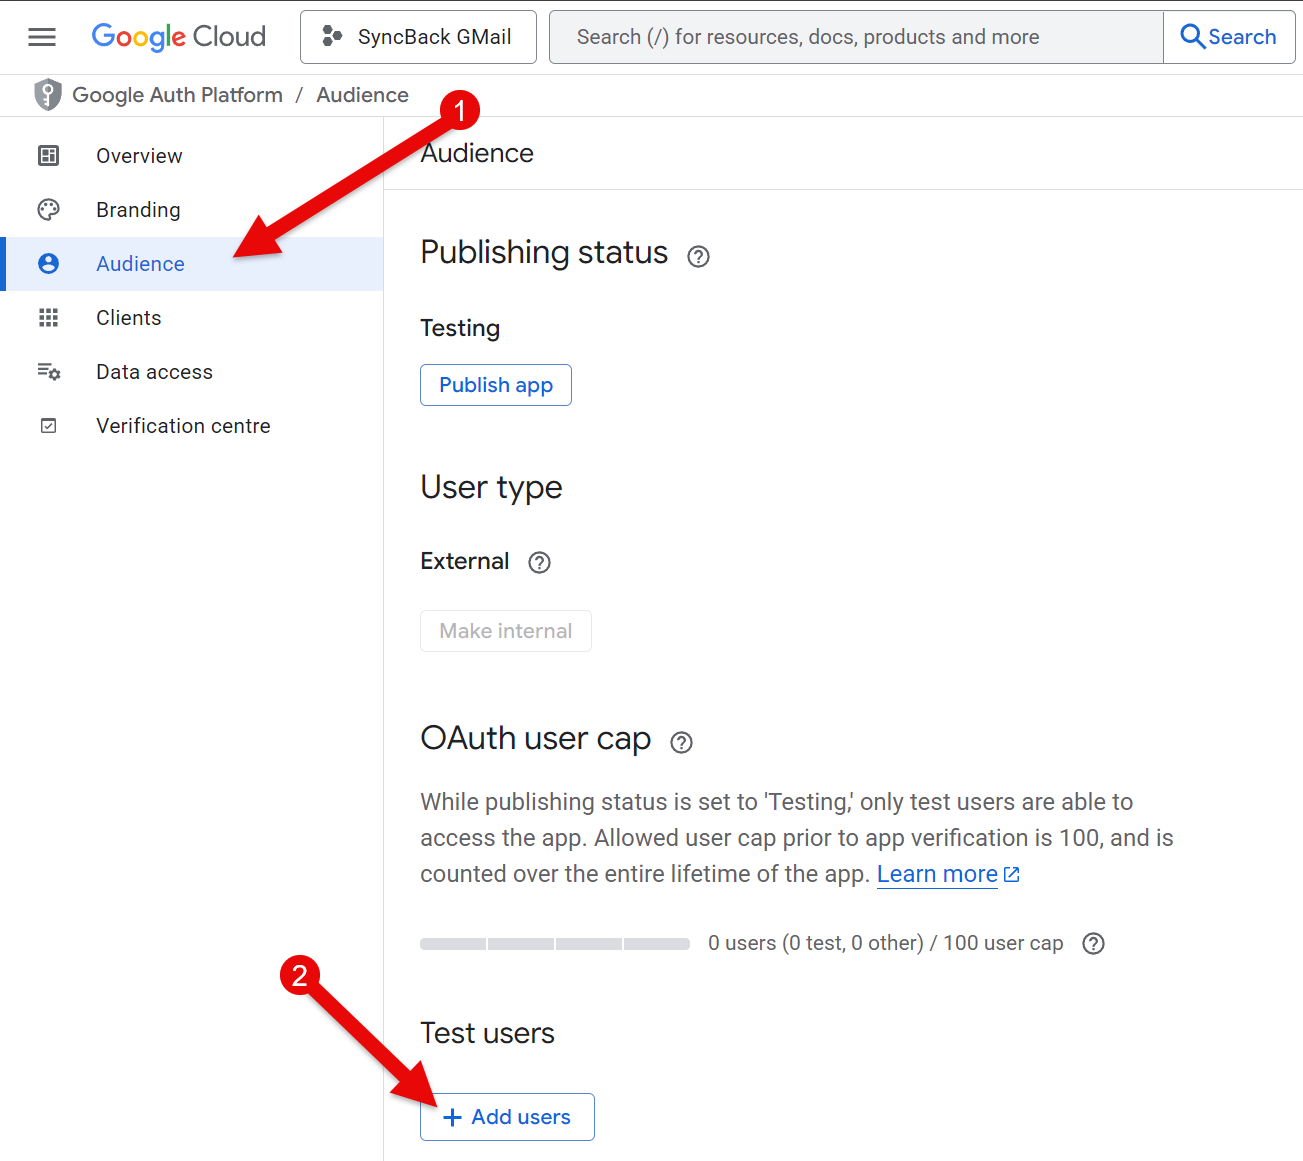
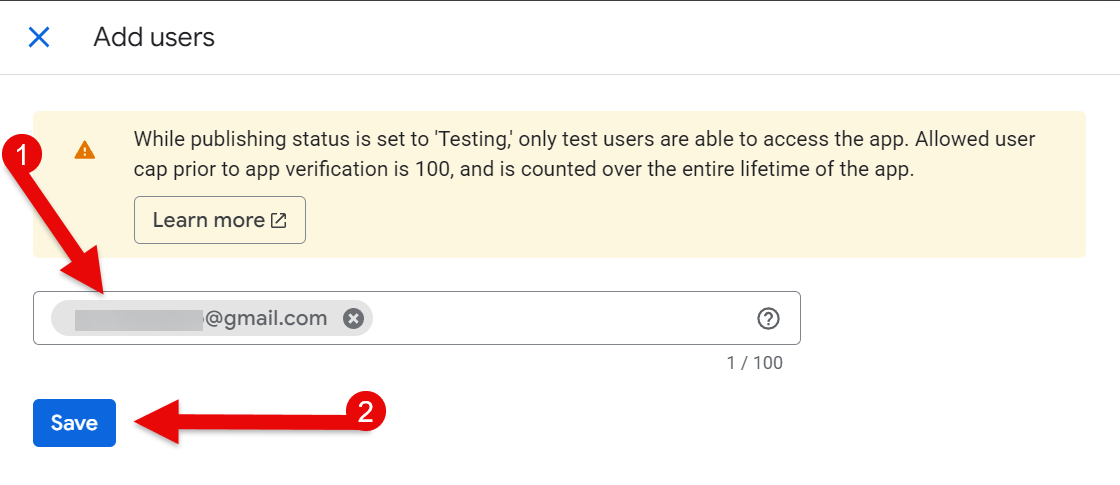
- Enter your email address (the email address you will use in SyncBack to either email logs or backup your emails). You can add multiple email addresses. Click Save once you've added all the email addresses. It may take a few moments.
Downloading Credentials
We can now download the credentials that will be used by SyncBack to access Gmail. They can be downloaded to a JSON file, which SyncBack can then use.
- First, select Clients in the menu on the left of the window, then click on the SyncBack Gmail entry that we've just created (you may have given it a different name):
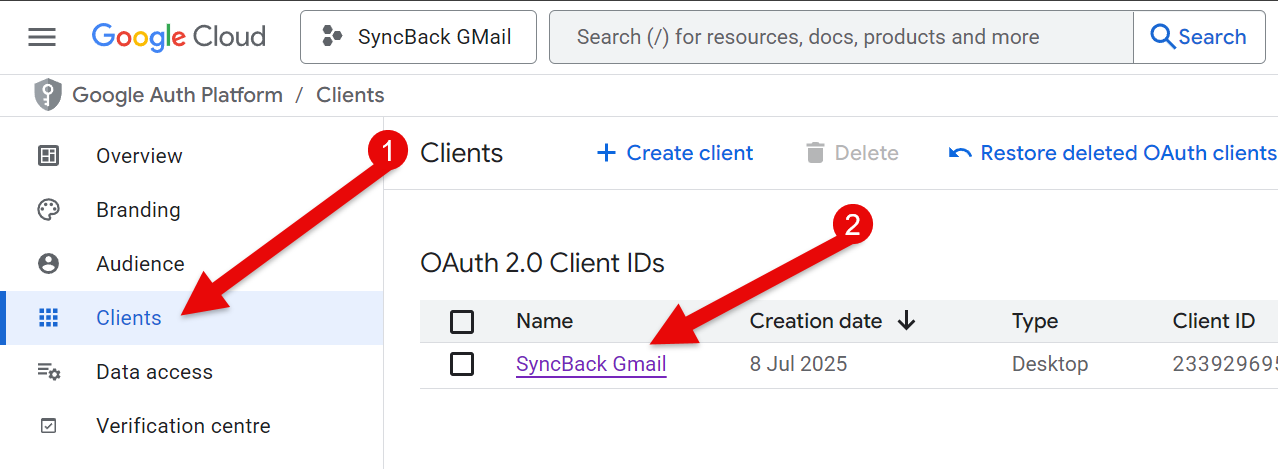
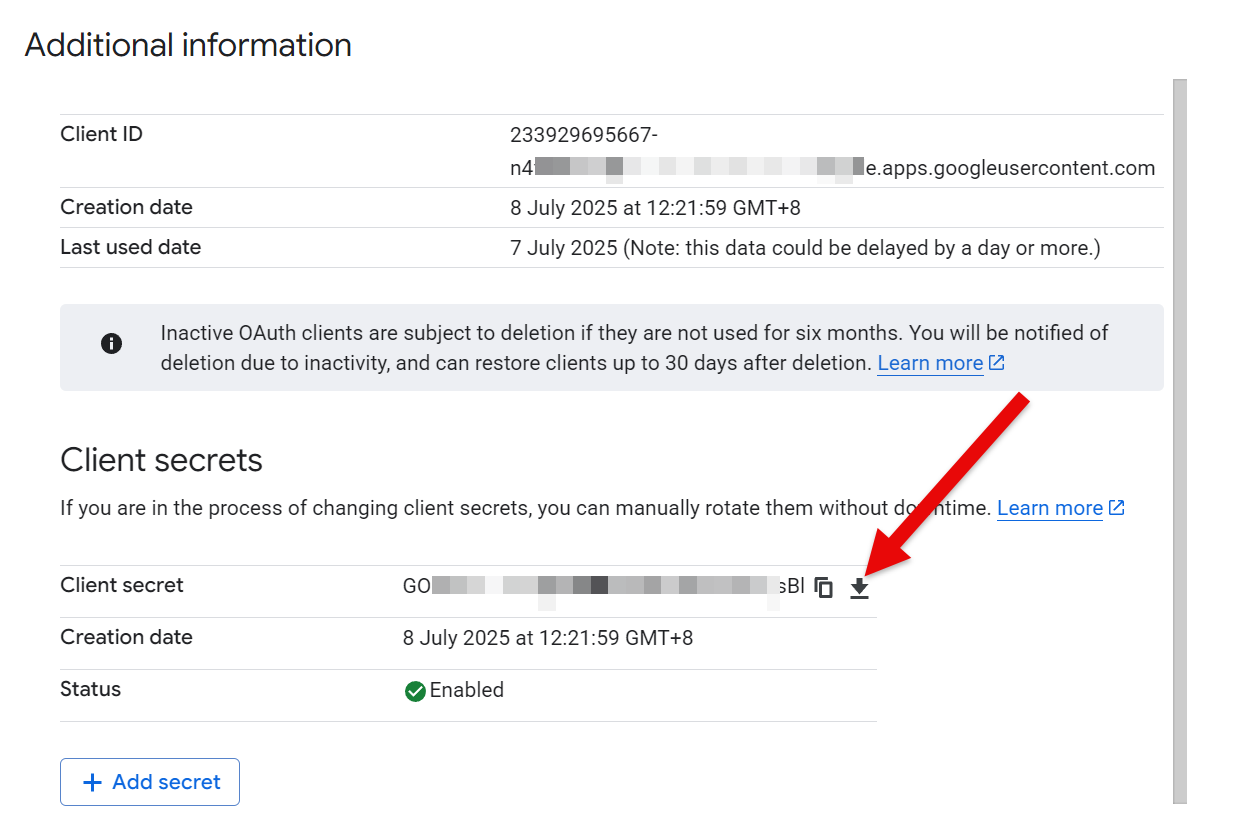
- Additional information will appear on the right of the browser window. IMPORTANT: If you're browser window is not wide enough then nothing will appear. Click the download button to download the credentials to a JSON file. Take note of where that file is downloaded to as it will be required by SyncBack.
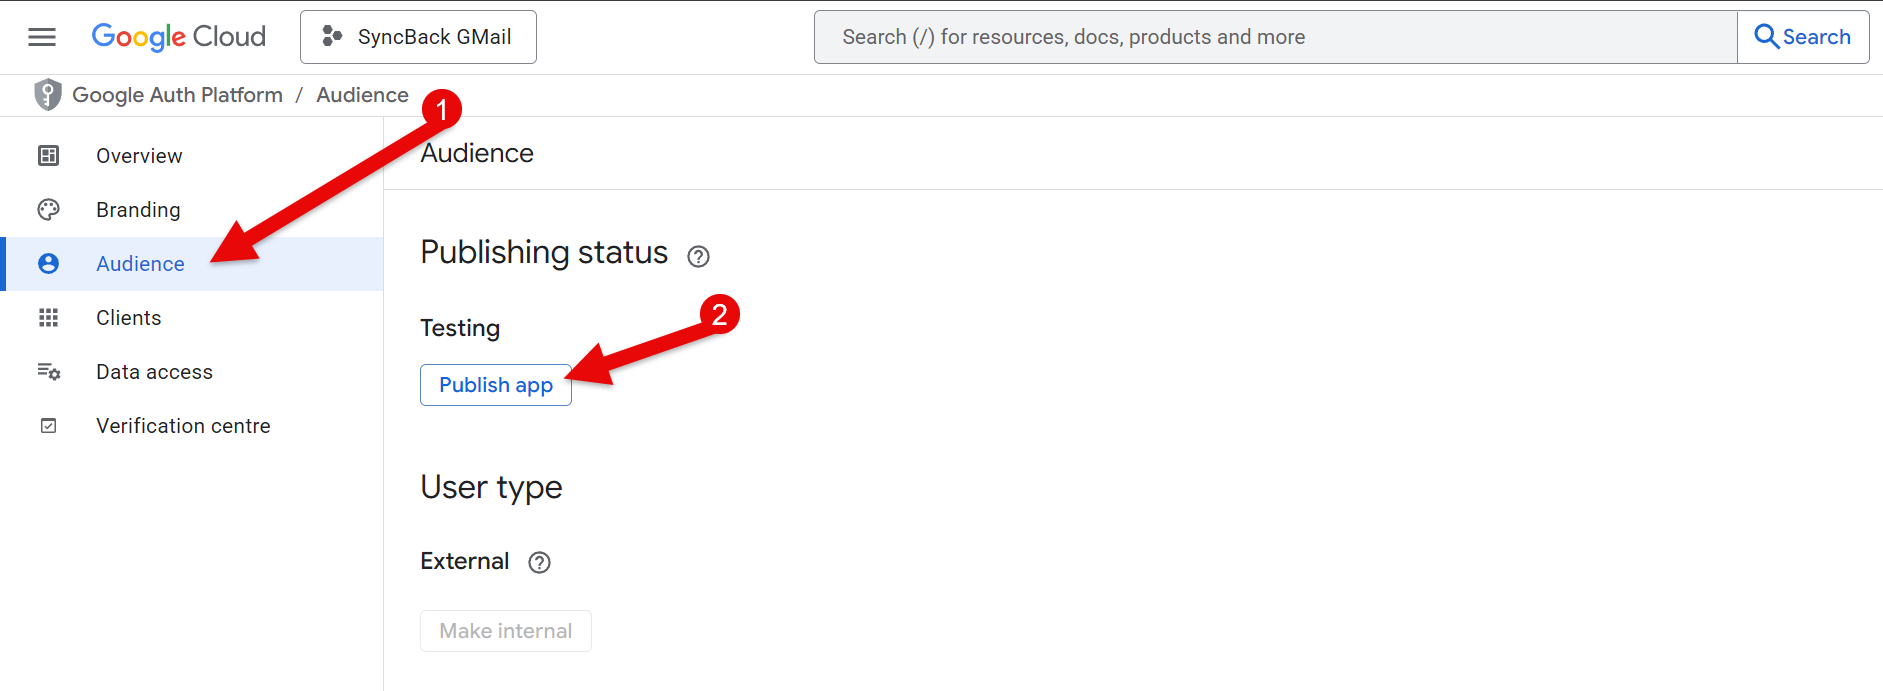
Publish
Finally, we can make the project available to use by SyncBack:
- Click the Audience link on the left then click the Publish app button.
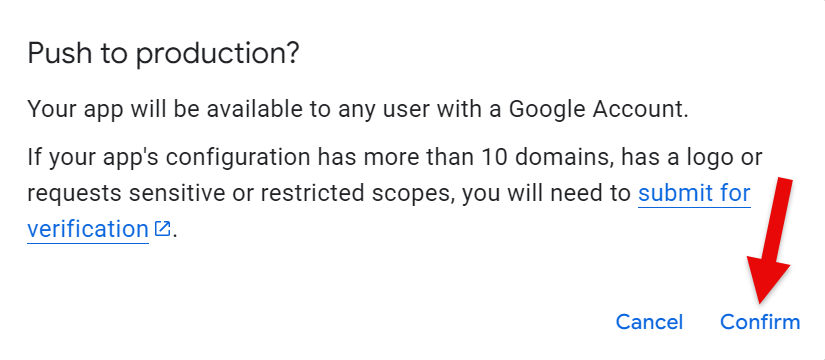
- A pop-up window appears (Push to production?). Click Confirm. It may take a few moments to process.
- Congratulations! You can now use SyncBack to email logs or to backup your email. IMPORTANT: Do not click Go to verification centre or Prepare for verification. It is not required or necessary.
Using it with SyncBack
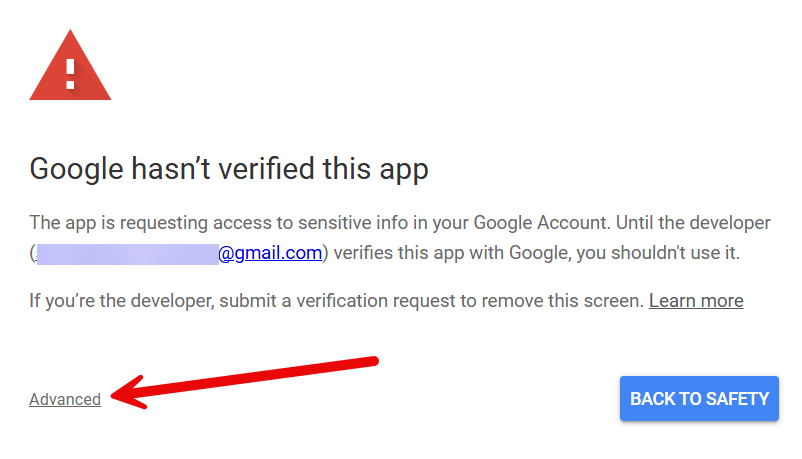
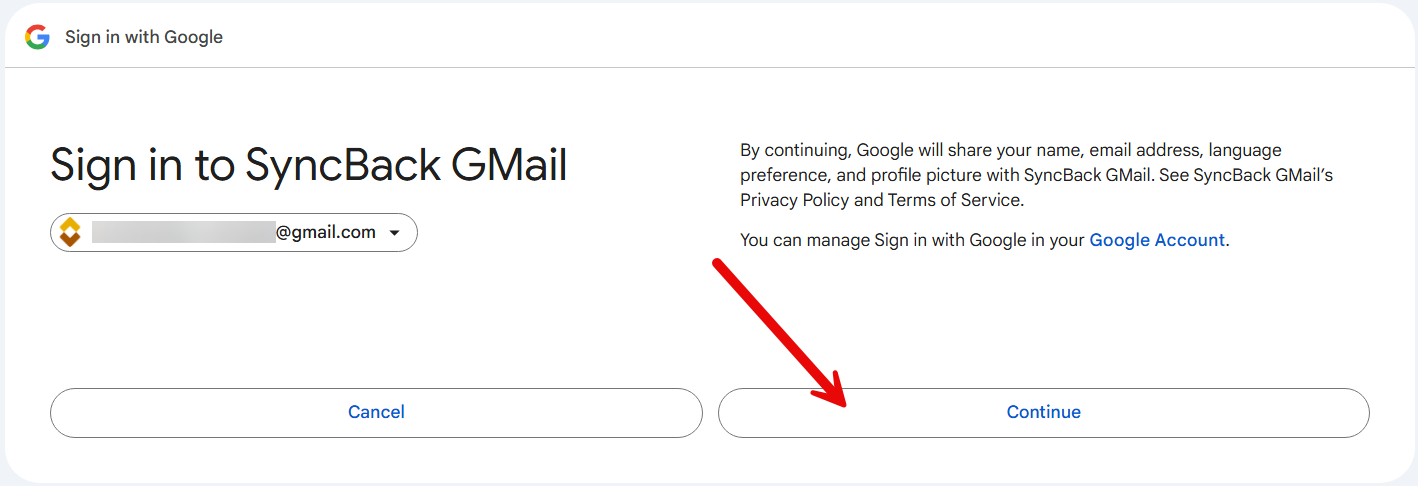
When you first connect to Gmail from SyncBack, Google will need you to approve it:
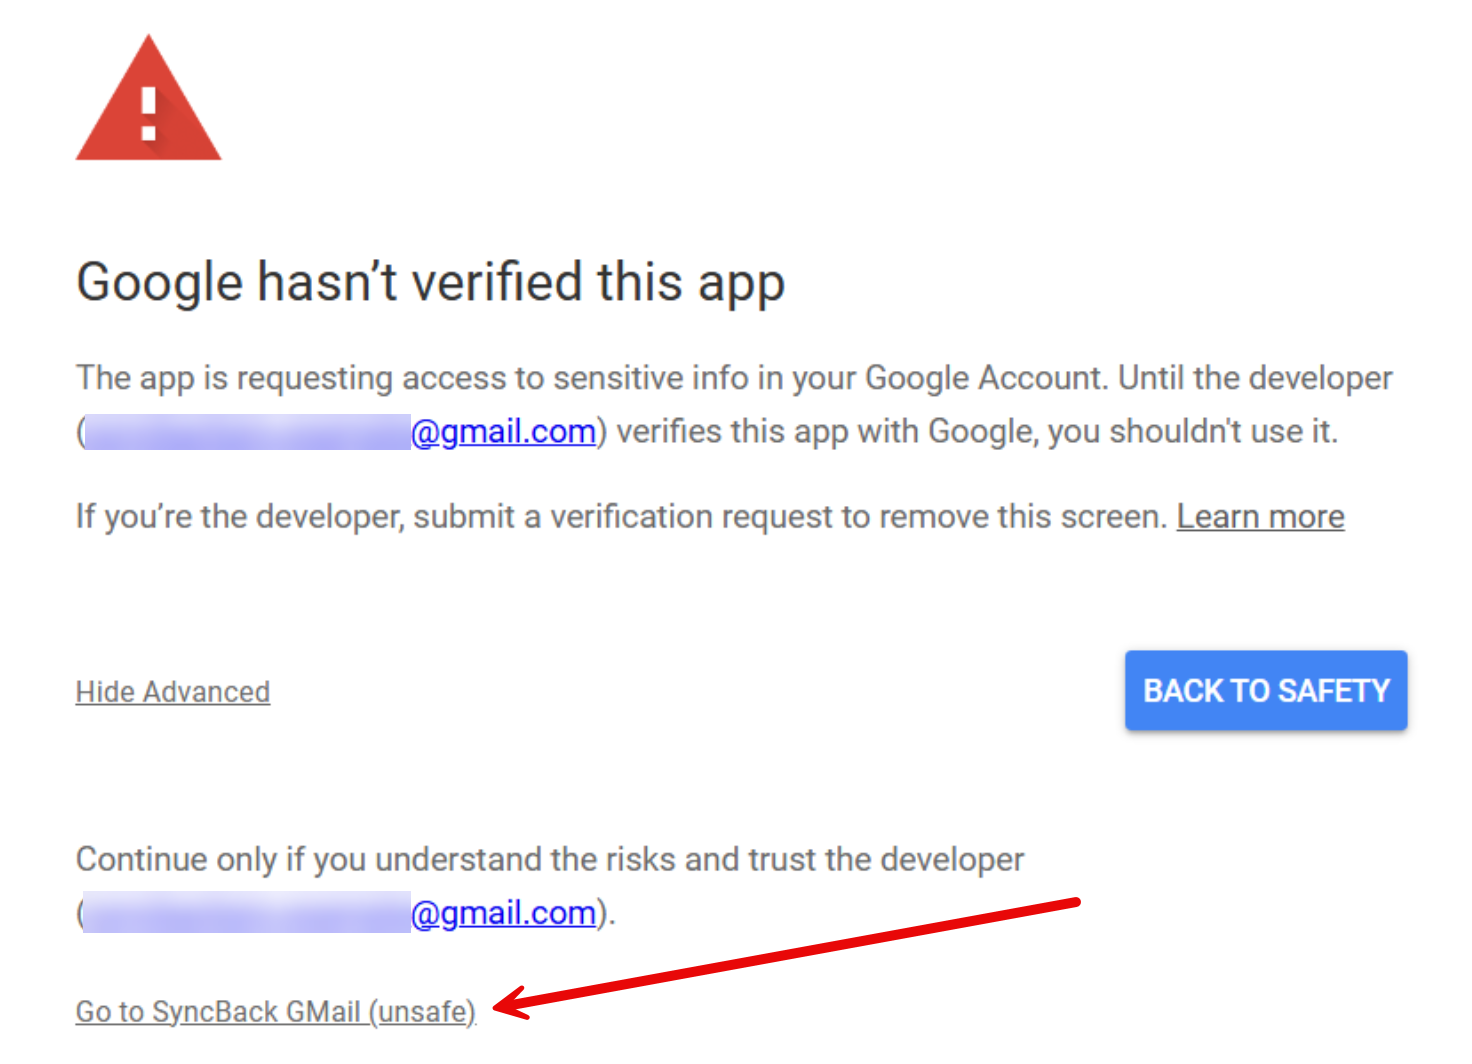
- First, you will receive a warning about the app not being verified. Click Advanced:
- Next, click the Go to SyncBack Gmail (unsafe) link - note that the exact text depends on what you named your project:
- Next, click the Continue button:
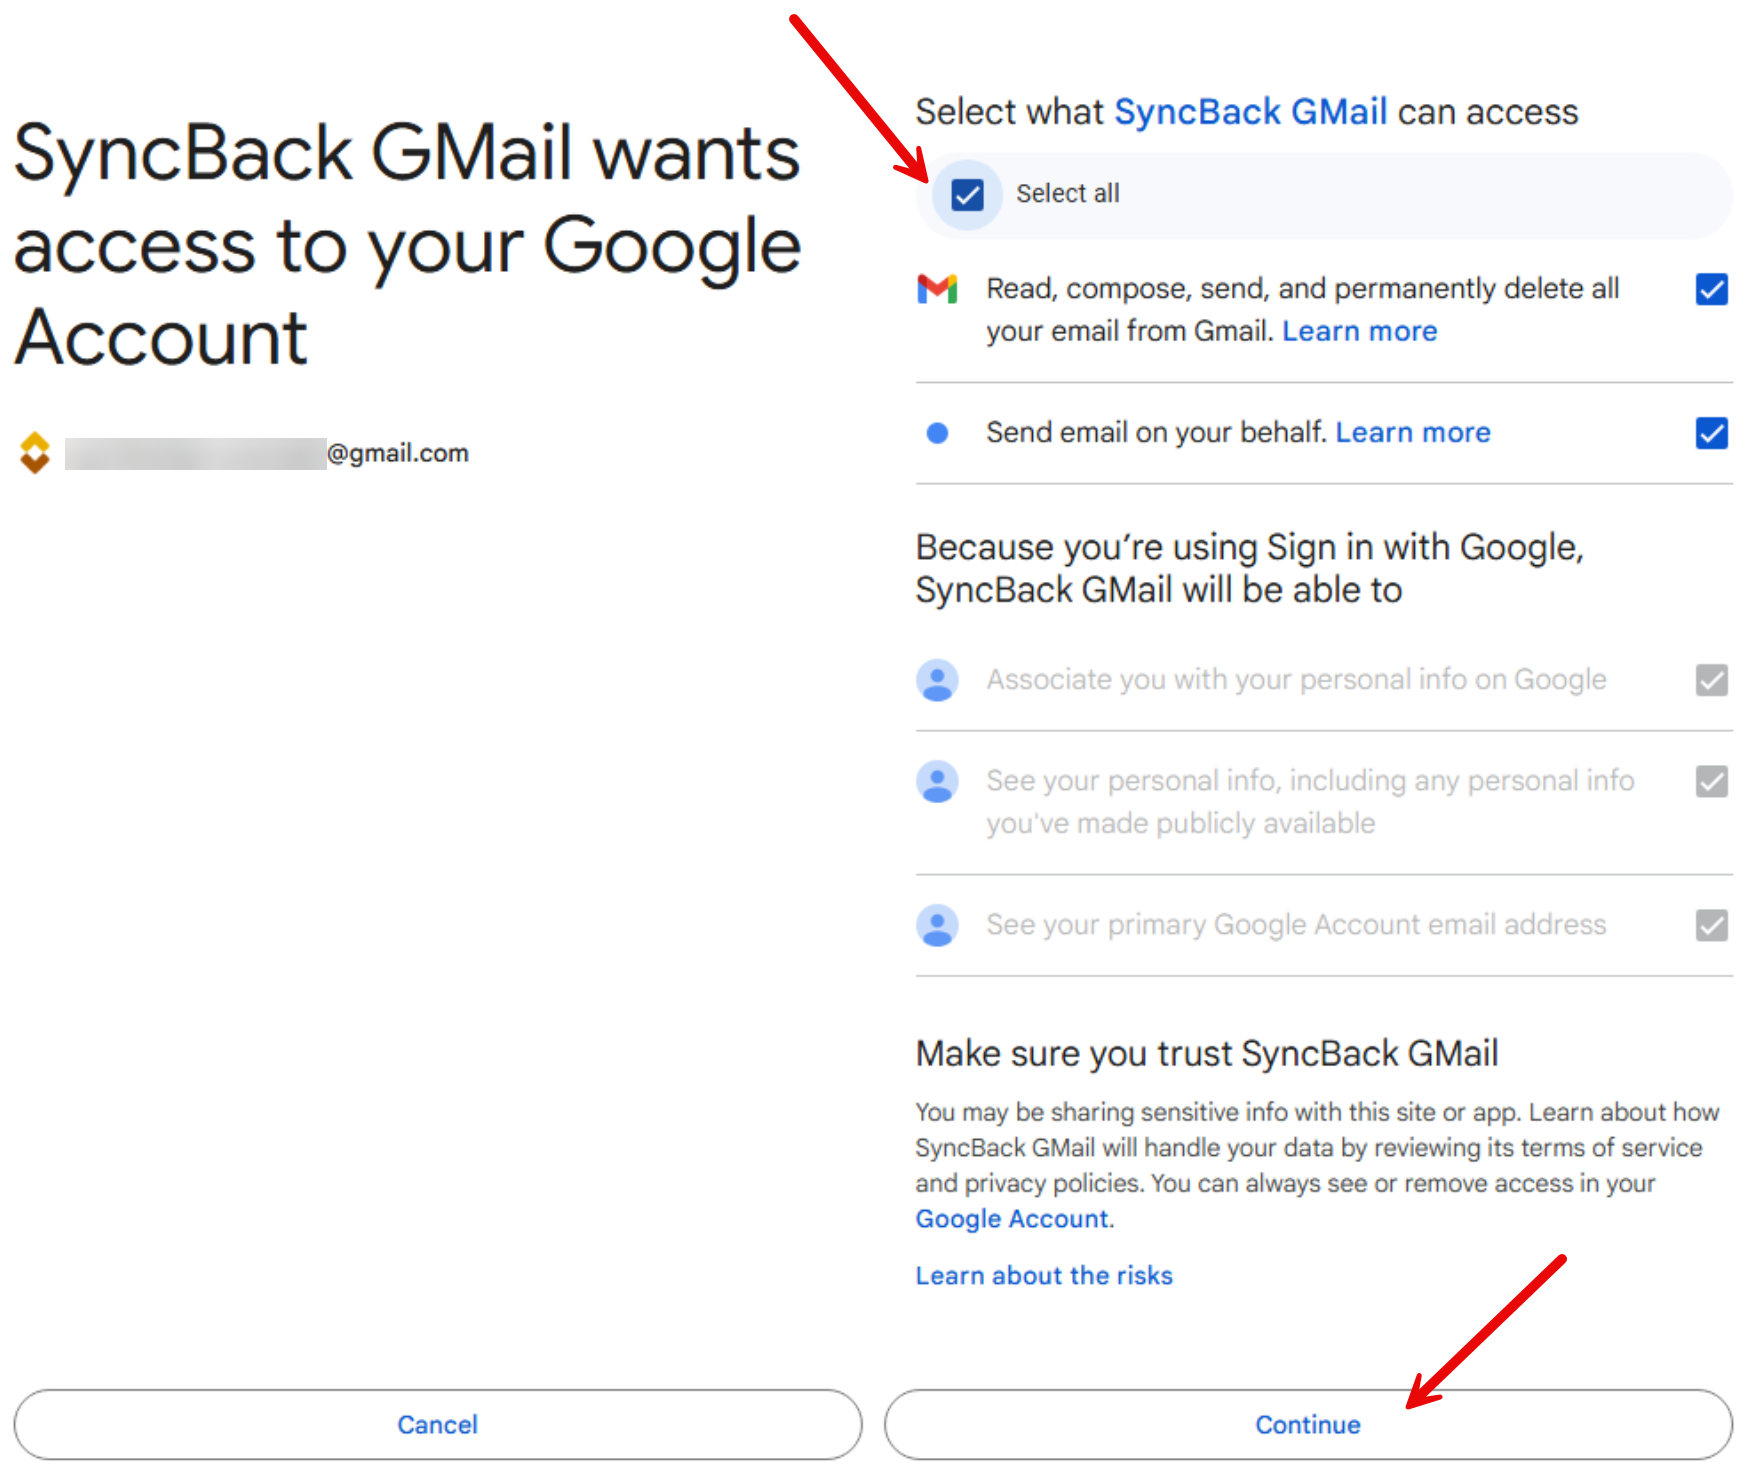
- Click the Select all checkbox at the top, then click Continue:
- You will now get a confirmation message. Return to SyncBack and it will also confirm that SyncBack is authorized:
