
Using Rackspace Cloud Backup with SyncBackPro
Author: Conrad Chung, 2BrightSparks Pte. Ltd.
Rackspace Cloud is a cloud storage and hosting service provided by Rackspace, a managed cloud computing company. In this article we will focus on how to configure a cloud profile in SyncBackPro to back up your data to Rackspace Cloud.
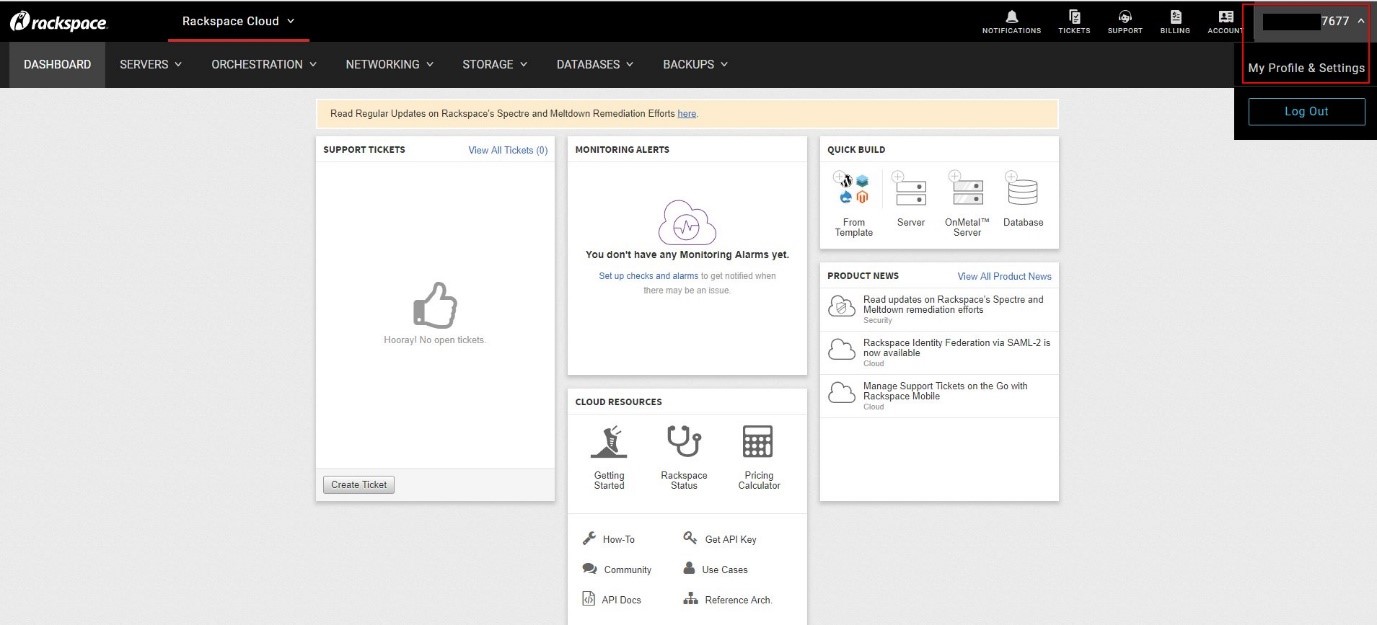
1. Login to your Rackspace Cloud Control Panel
You can login to your Rackspace Cloud account here. This is the Dashboard page you will see when you are logged in:
To setup your Rackspace cloud profile in SyncBackPro successfully, you will need 2 things:
- Your Username
- Your Rackspace API Key
To get these authorization details, click on your username dropdown menu at the upper-right corner of the Dashboard, then click on My Profile & Settings to go to the next page.
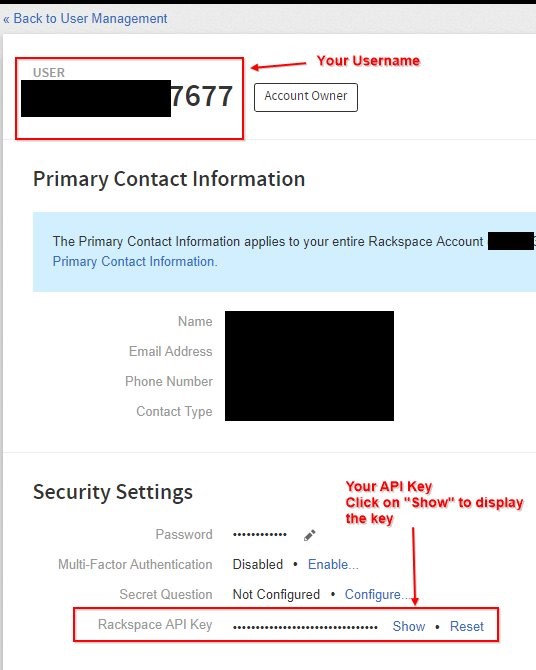
On your Profile & Settings page, you will find your Username and your API key. Click on the “Show” button to display your API key. Take note of this information. We will come back to them later.
2. Create a Rackspace Cloud profile from SyncBackPro
Start SyncBackPro, and create a new profile using the Profile Creation Wizard (Profiles > New). Follow the on-screen prompts to provide your profile with a name, and select a profile type (Backup, Synchronize or Mirror).
On the location selection stage, click on either Source or Destination dropdown list and select Rackspace/OpenStack.
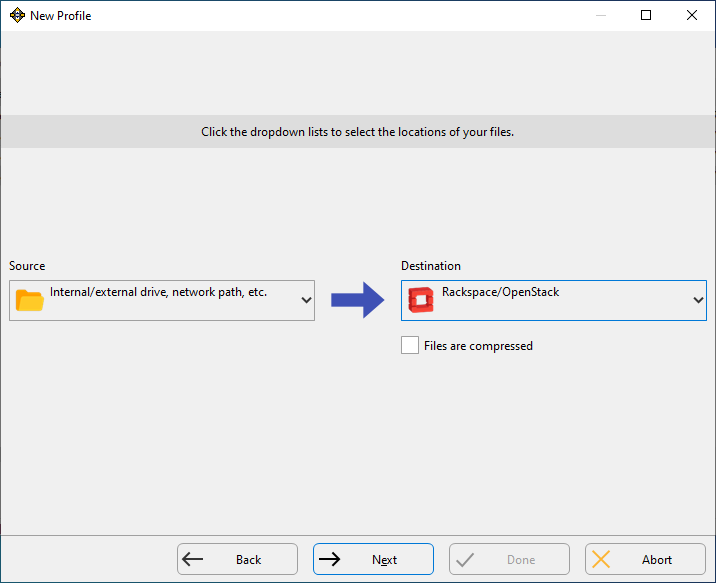
You can set Rackspace cloud as either your Source or your Destination, depending on whether you are backing up to or from the cloud storage.
At the Cloud Connection Details stage, you will need to fill in your Username and API key (which you got from step 2 above). Copy and paste the information from your Rackspace Profile & Settings page.
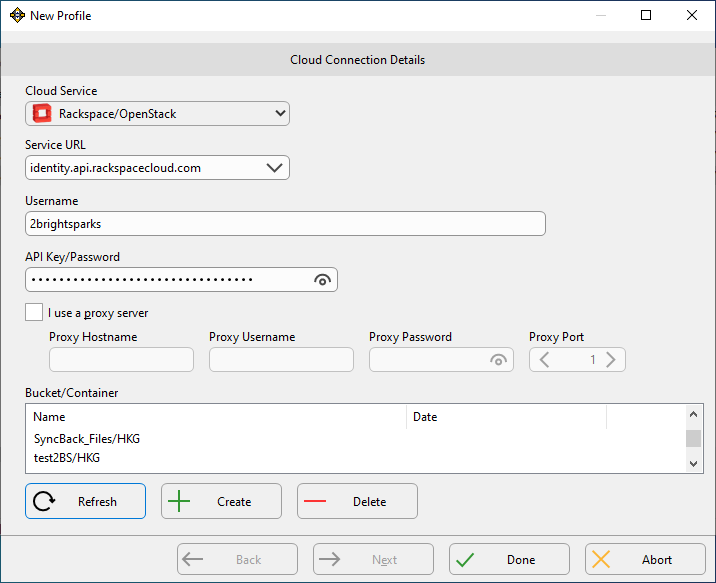
After entering your Username and API key, click on the Refresh button to check for existing Containers. Containers are required to store your files and folders. If there is no Container found, create one by clicking on Create.
Click Done to complete the profile setup.
Your Rackspace cloud profile will appear on the main program window. Click on Run to start a backup.

Conclusion
With this guide, you have successfully set up a Rackspace cloud profile in SyncBackPro.
SyncBackPro, developed by 2BrightSparks, offers a convenient and effective way to backup files between your system and your cloud storage servers.
In addition to this guide, you may also be interested in reviewing other cloud backup articles on our site.
2BrightSparks also features hundreds of articles in our Support Knowledge Base which you may find valuable.